Scheduler
Introduction
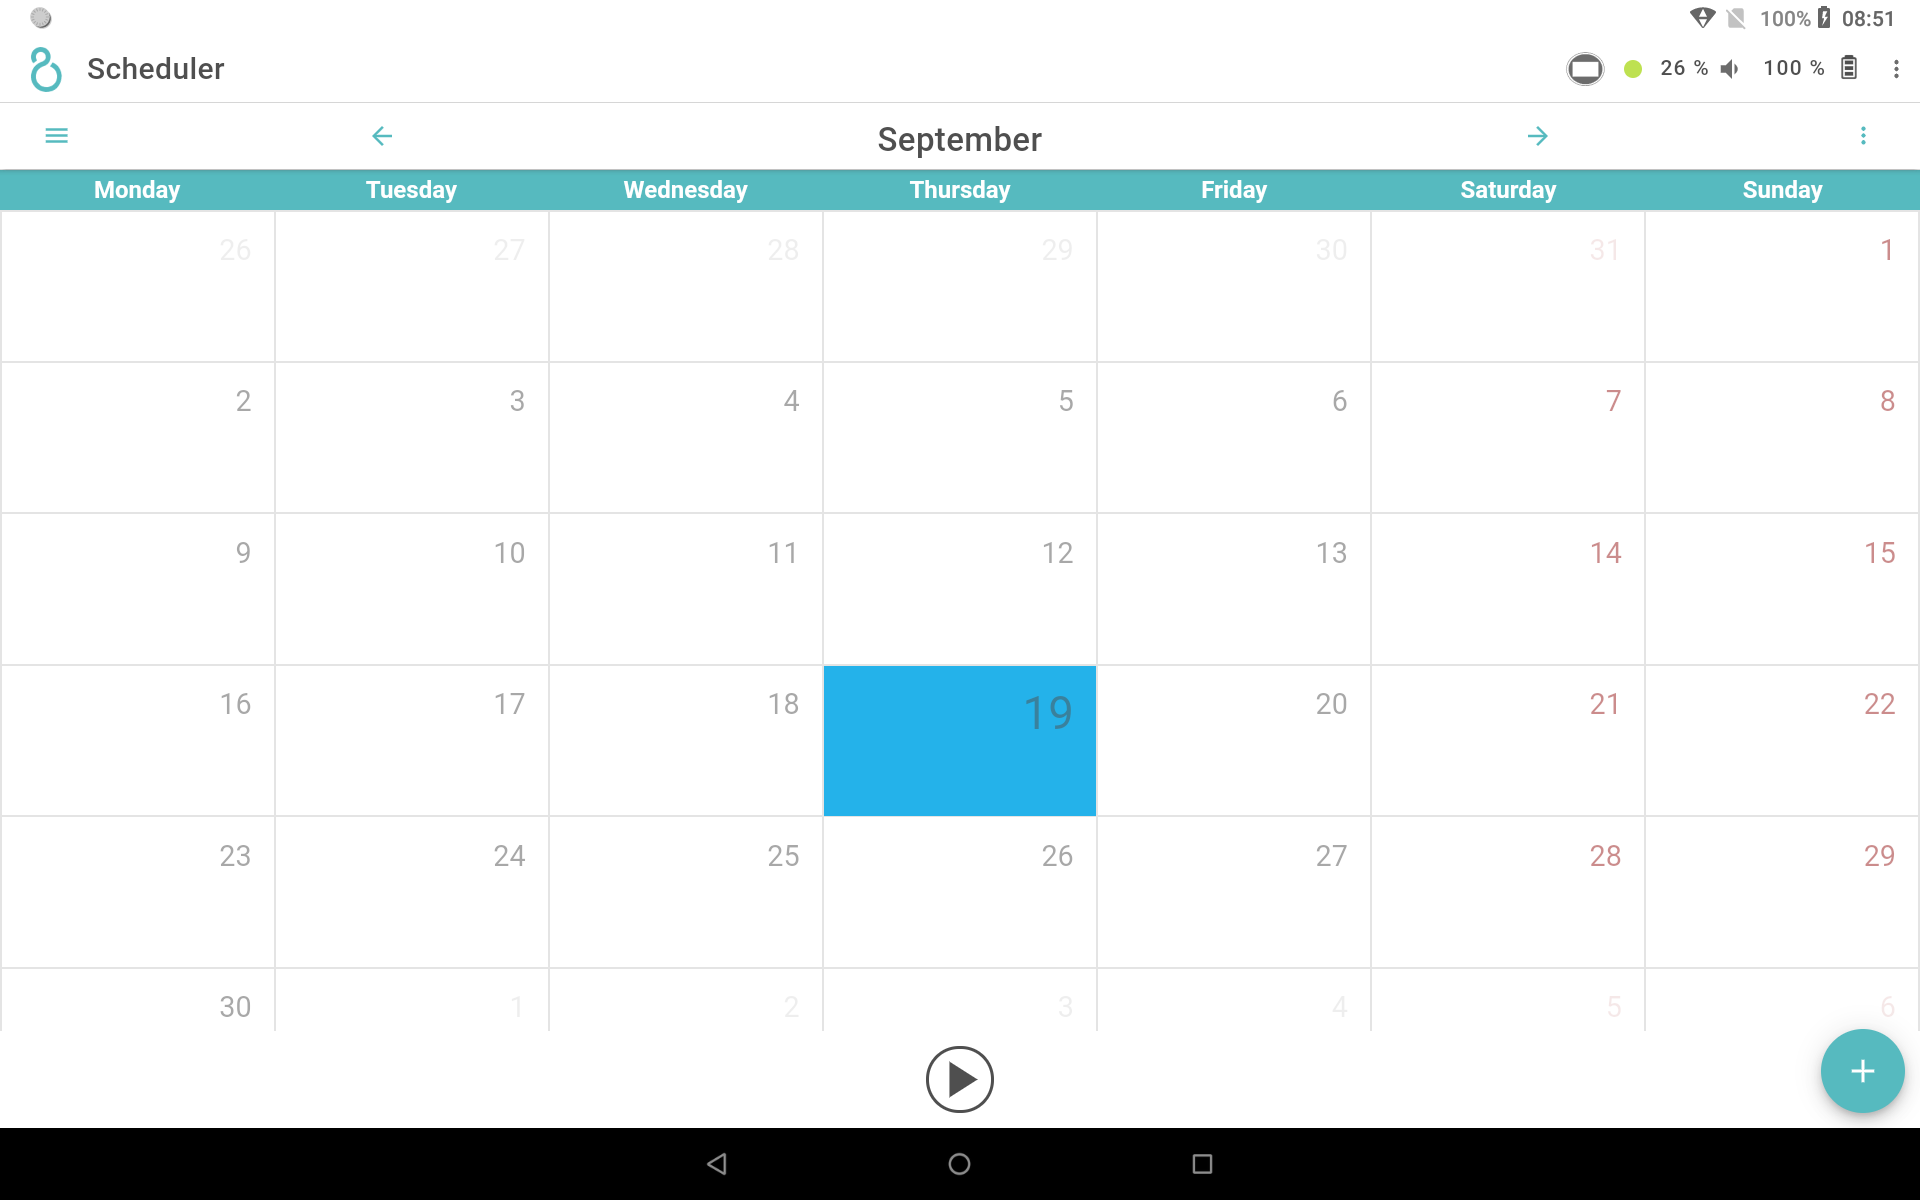
The scheduler allows you to easily schedule compositions to run on specific dates and hours. For easier user-interaction, a system similar to a calendar applications is used.
| Normal operation can still be used while the scheduled composition is running. |
Terminology
The following terminology is used for this chapter:
| Term | Explanation |
|---|---|
Scheduler |
The page in ZBOS Control showing the schedule in a calendar-view. |
Schedule |
The programmed series of events in the scheduler. |
Event |
A programmable action the device can take at specific times. |
Composition |
A dataset containing a series of actions the device will take. |
Timeslot |
The period during which the linked action will be executed. |
Using the scheduler
| Certain composition-blocks bring certain limitations in the execution of other actions, such as starting a video while a video is already playing or accessing the camera for both movement detection as well as manually monitoring the event. It is highly recommended to create a composition stored on the device and scheduling to play the composition should more complex actions be required. |
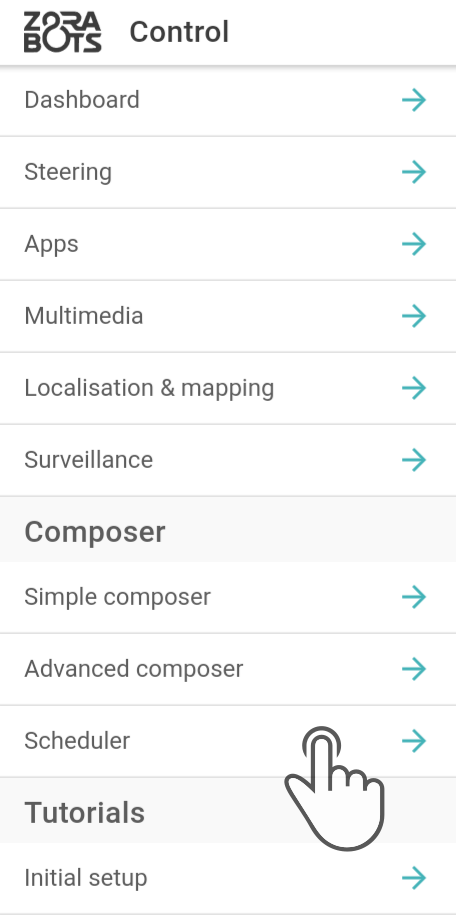
Tap the icon ![]() to open the menu in ZBOS Control and tap the section marked Scheduler to show the scheduler-page.
to open the menu in ZBOS Control and tap the section marked Scheduler to show the scheduler-page.
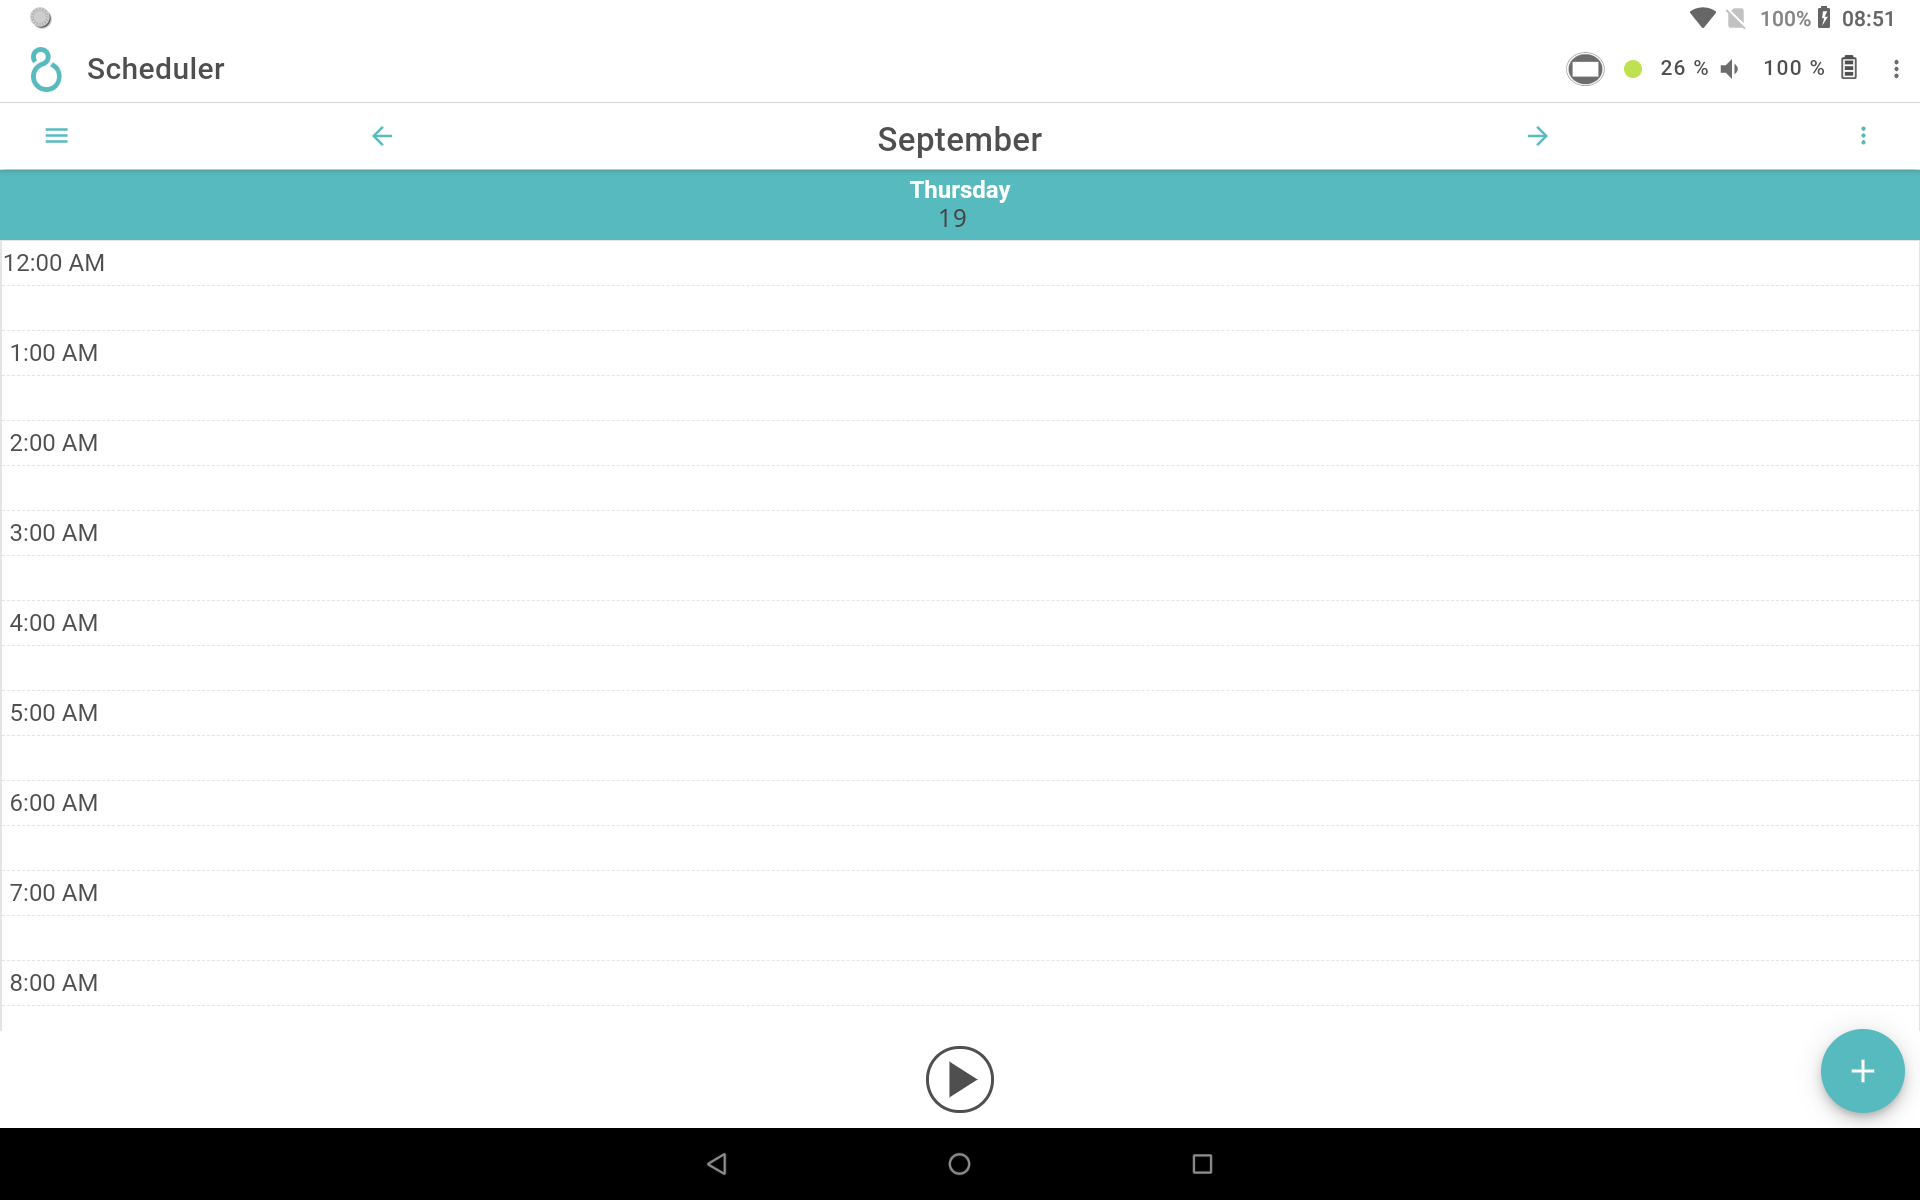
Overview
This page contains the following sections:

-
Display-options (Month,Week or Day)
-
Selection-field (Change the date/week/month using the arrows)
-
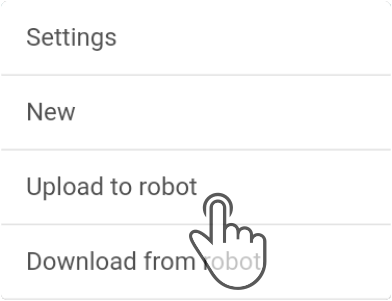
Settings (New/Upload/Download)
-
Calendar view (Contains the scheduled events)
-
Start/Stop button
-
Add new event
|
Use the following sequence when uploading a schedule to the device.
|
Changing the view of the scheduler
Tap the icon ![]() to open the available display settings. Tap the available option to change the view as shown below.
to open the available display settings. Tap the available option to change the view as shown below.
| Day | Month | Year |
|---|---|---|
|
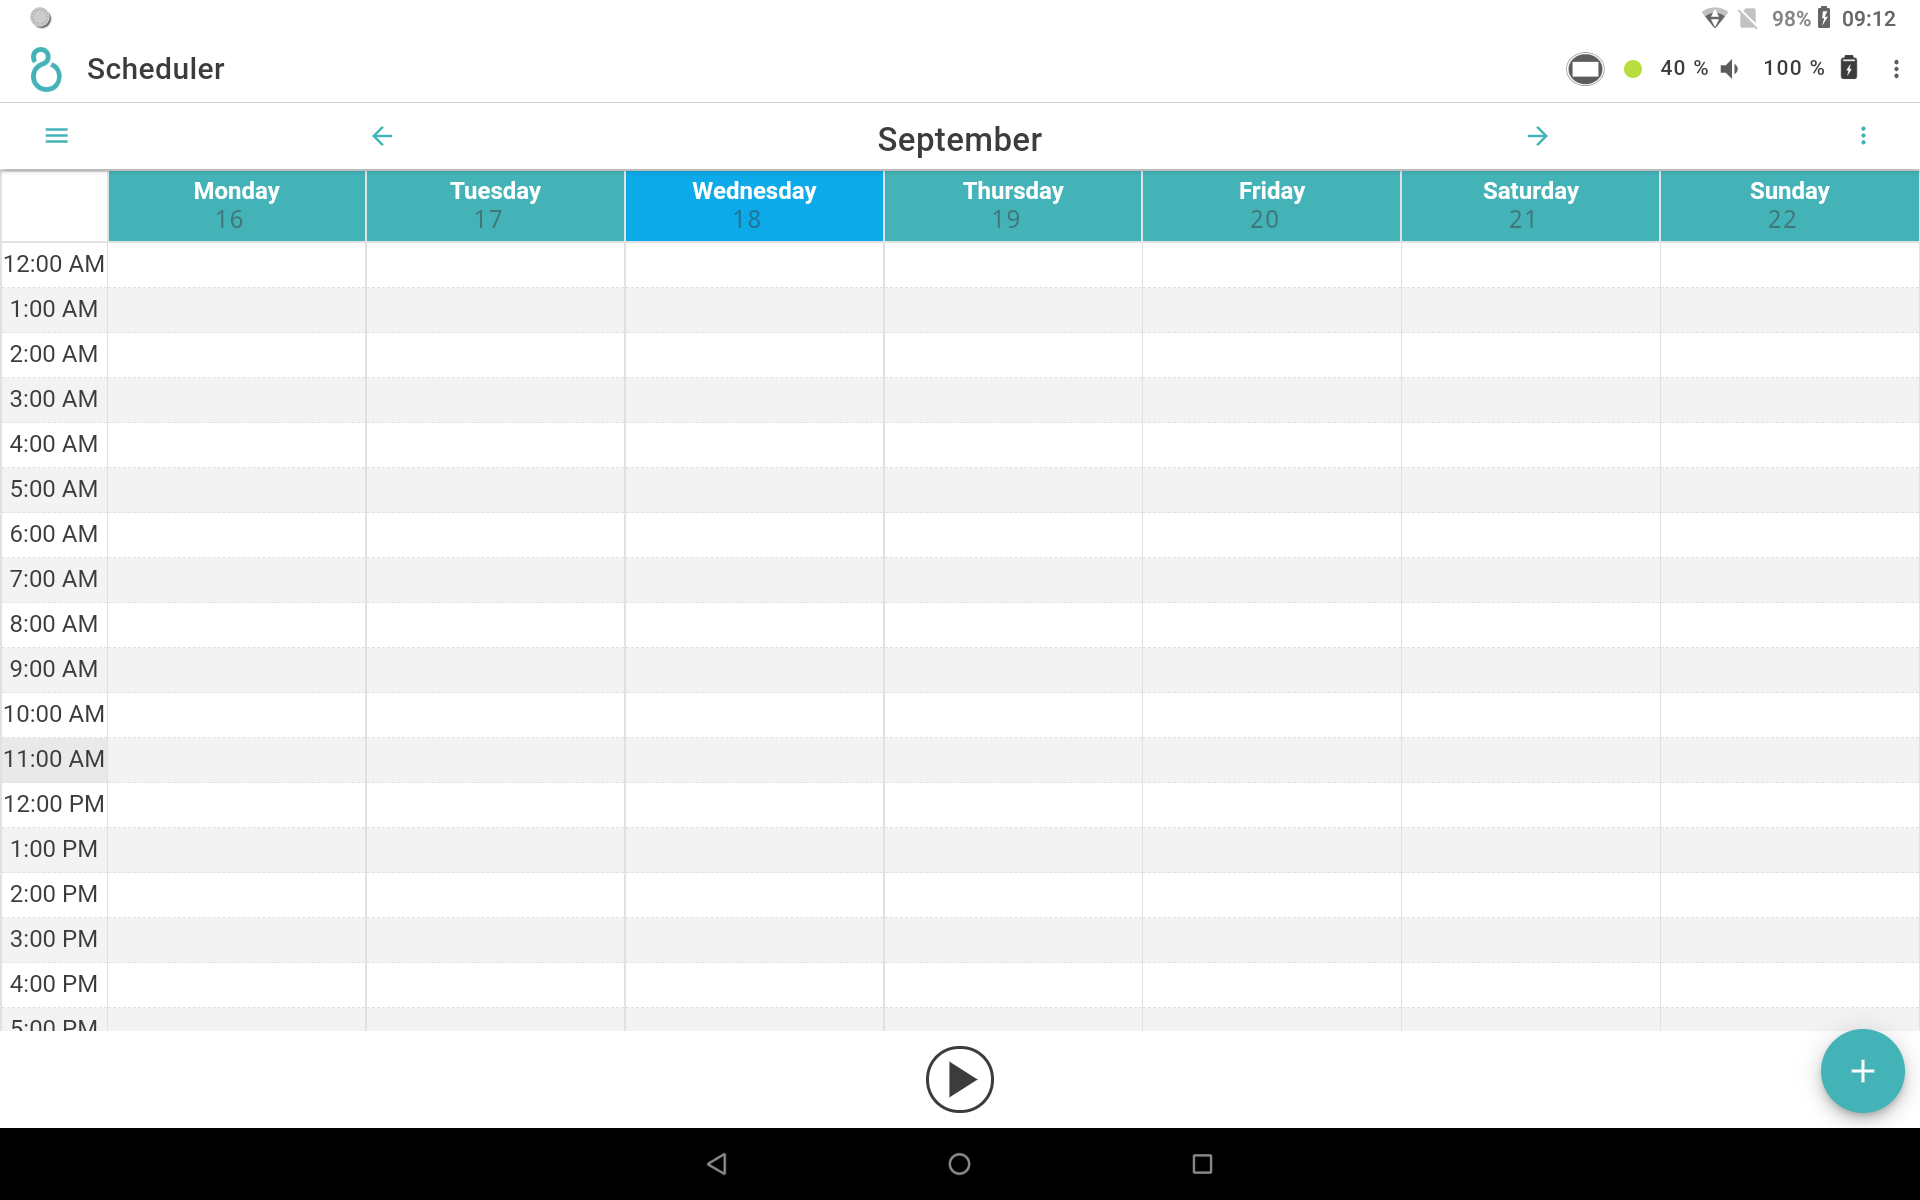
|
|
| Events cannot be added while in Month-view. Tapping a specific date will open the Day-view, where the event can be added instead. |
Available actions
The scheduler can contain an entire composition or just a single composition-block of the simple composer. See the chapter Simple composer for more information on the available blocks and their required setting.
| All block-types are shown, but only the available actions will be taken (e.g. James will not dance or Cruzr will not go to a POI on a James-map, …). |
Creating a new schedule
| A new schedule will automatically be created when starting the app for the first time. |
Tap the button New in the Settings ( ![]() ) to start a new schedule.
) to start a new schedule.
Downloading the schedule from the device
| Downloading the schedule from the device will cause the schedule loaded in ZBOS Control to be overwritten. |
Tap the button Download from device in the Settings ( ![]() ) to apply the currently stored scheduled in ZBOS Control.
) to apply the currently stored scheduled in ZBOS Control.
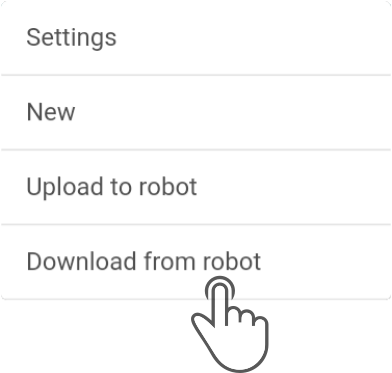
Tap the desired schedule to download from the device and tap the button Download to load the schedule in the current editor.
| Before adding events to the schedule, download the currently stored schedule to ZBOS Control to avoid overwriting existing events. |
Adding an event to the schedule
|
There are 2 ways to add an event to the schedule, specifically:
-
Tapping the time-slot in the calendar-view
-
Tapping the Add-button (
 ) to schedule a new event
In either case, the modal for adding a new event will be shown. The only difference being the starting-time that will be set to the current time in the modal (2) or to the start of the time-slot (1).
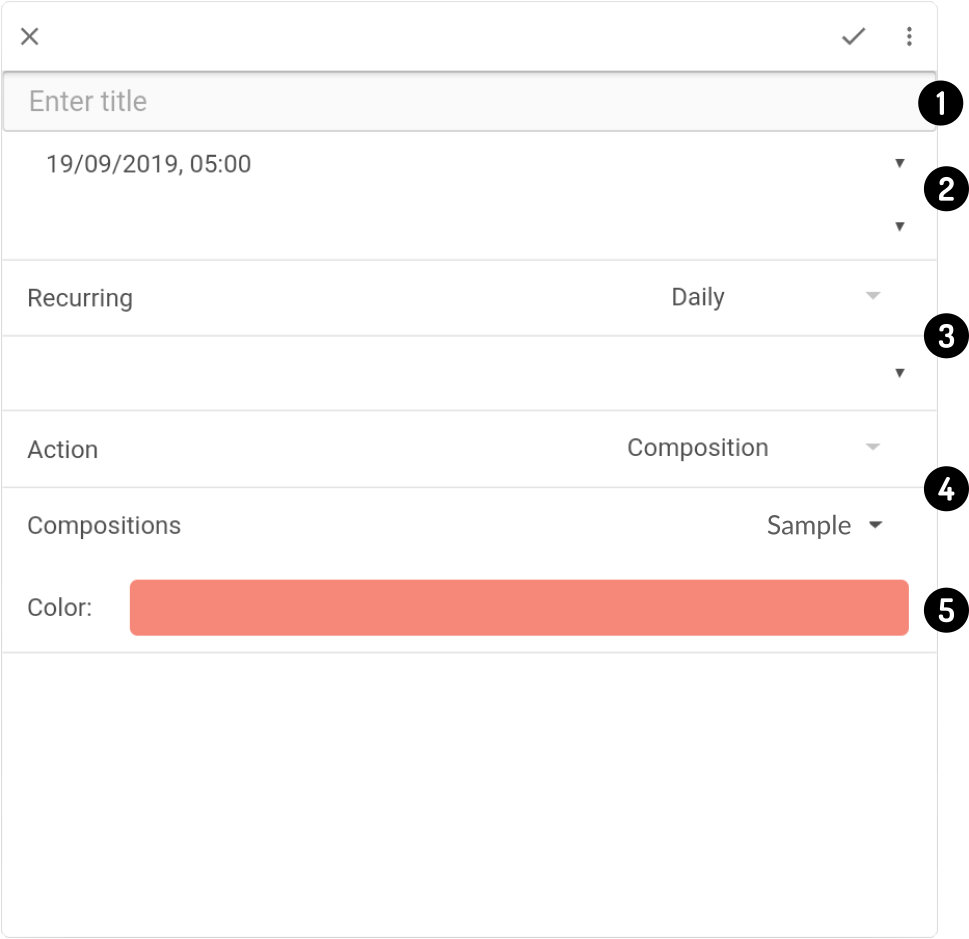
-
Title of the event
-
Timeslot (Start and End-time)
-
Repeat until (No repeat, Hourly, Daily, Weekly, Monthly, Yearly)
-
Action to be taken by the device (Additional fields may be provided)
-
Color of the event in the scheduler
Tap the icon ![]() to add the event to the schedule.
to add the event to the schedule.
Examples
The following examples of scheduled events can be shown in the editor:
-
Alarm-clock
The following settings could be used to set an alarm at 5AM, with a repeat at 6AM:
-
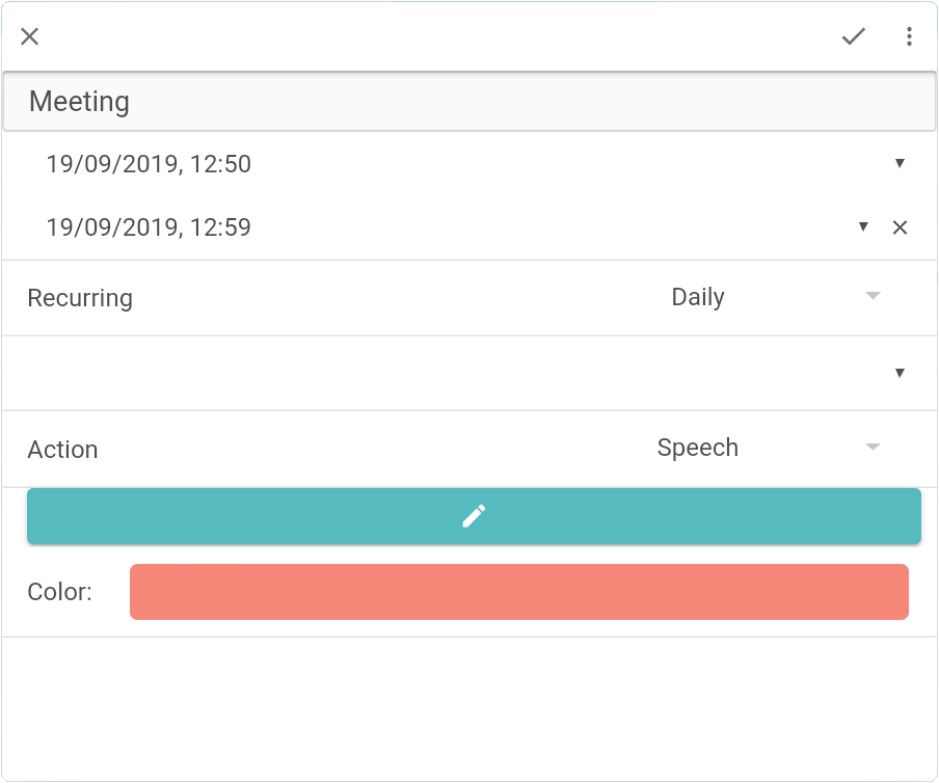
Meeting
The following settings could be used as a reminder for daily meetings at 1PM:
-
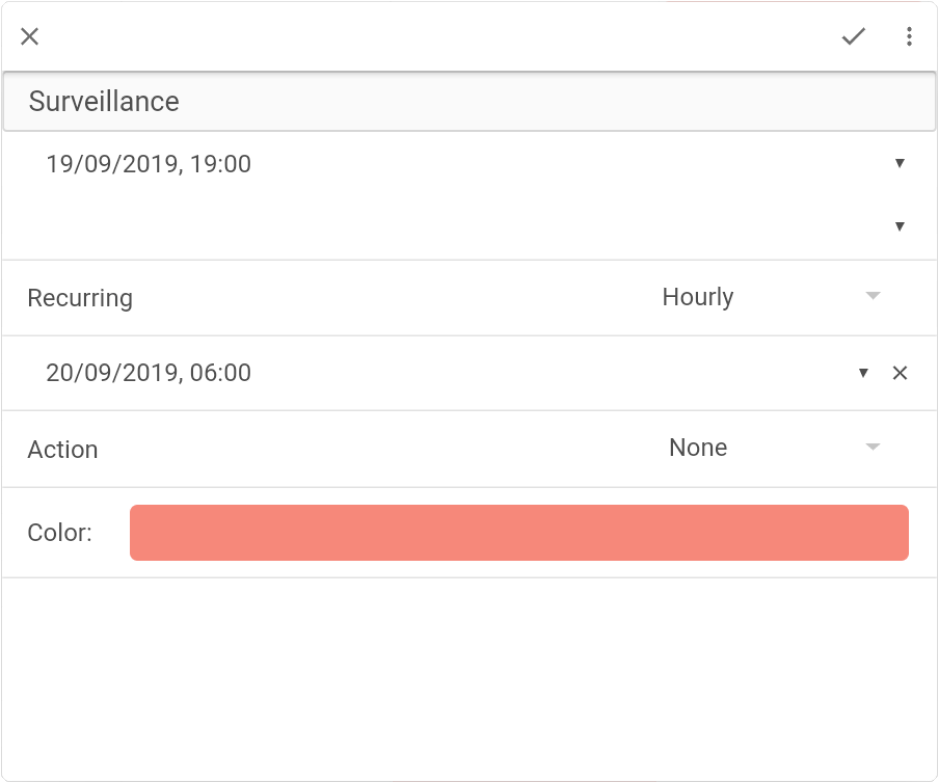
Surveillance
The following settings could be used to monitor the surroundings:
Editing an event
| If the timeslot for the event is too narrow to tap, change to the display to Day to increase the height of the event and switch the phone/tablet to portrait-orientation. |
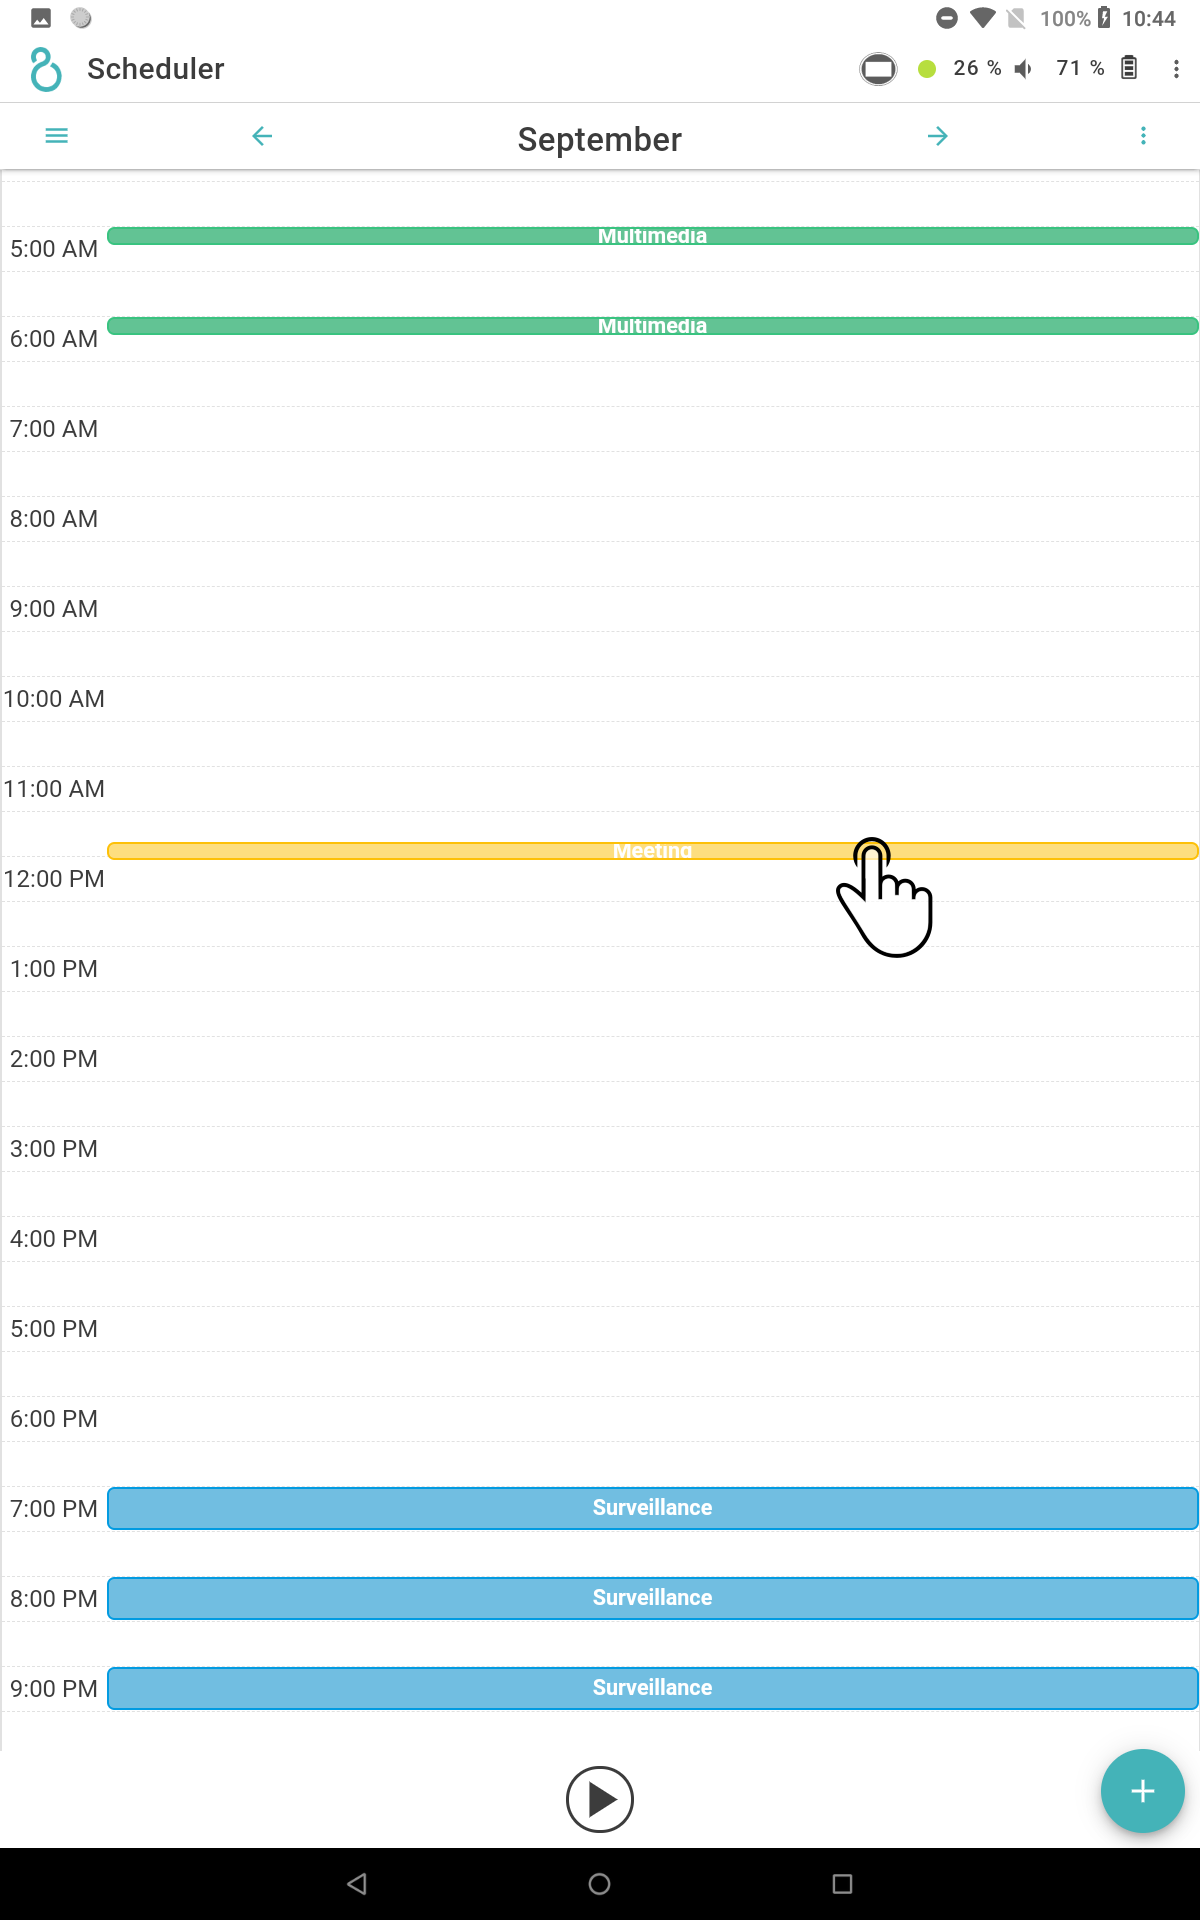
Tap the event in the scheduler to open the modal with the settings for the event.
Removing a non-recurring event
Open the editing-window of the event (see Editing an event) and tap the icon ![]() to open the settings.
to open the settings.
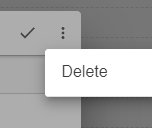
Tap the option Delete to remove the event from the schedule.
Removing a recurring event
Tap the icon ![]() to display the settings for repeated events:
to display the settings for repeated events:
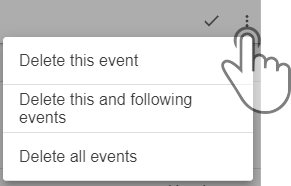
-
Tap the option 'Delete event' to delete only the selected event.
-
Tap the option 'Delete this and following events' to delete all future events (current event included).
-
Tap the option 'Delete all events' to remove all events related to the selected event.
Managing the schedule
| The schedule will only be stored in the app by default. |
When starting a schedule from the app, a (temporary) schedule will be uploaded to the device before it will be started. This schedule will be erased every time the app is re-started (e.g. installing updates, rebooting the device, …).
To start the schedule every time the device is started (e.g. Alarm-clock), tap the option Upload to device to upload the schedule to the device.
| The scheduler needs to be started for the planned events to be executed, even if the schedule has been uploaded to the device. |
Storing the schedule
| Only one schedule can be stored on the device, meaning the currently stored or active schedule will be overwritten. |
A schedule can be stored on the device in 2 ways:
-
Temporarily by starting the schedule in ZBOS Control
-
Permanently by uploading the schedule to the device
In case of the latter option, the scheduler still needs to be started before the schedule will be reloaded on reboot.
Starting a schedule
Tap the start-button (![]() ) to apply the schedule to the device until the next reboot.
) to apply the schedule to the device until the next reboot.
|
Uploading a schedule to the device
| This will overwrite the existing stored schedule. |
In addition to starting a schedule (which will only last until the next reboot or software update), a schedule can also be uploaded to the device. This will cause the schedule to be applied even if the device is rebooted.
Tap the icon ![]() to open the menu and tap the option Upload to device to store the schedule on the device.
to open the menu and tap the option Upload to device to store the schedule on the device.
| Keep in mind that the uploaded schedule will only be applied on the next reboot if the scheduler is running. |