Maps
The map is a combination of the environment scanned by the detection system of the device and elements added to the map by the user (virtual walls and/or POIs). The map is filled in by moving the smart device (at a reasonable speed) while the additional elements need to be added manually by the user.
|
The following steps should be used when creating a new map:
-
-
Map the environment
-
Add and edit or delete the POIs
-
Add and edit or delete the walls
-
-
-
Save a copy of the map
-
Creating a new map
| The SLAM-system must be active. This option shouldn’t be used when the device (and particularly the mapping system) is on standby. |
| If available, connect the device to the charging station before creating a new map. |
| It is recommended to save the map without any additions (i.e. walls or POIs) and then saving a copy of the map where the objects are added to the map. |
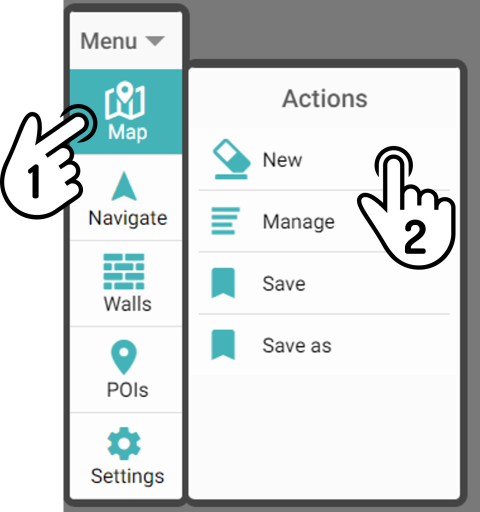
Tap the option New in the Map menu to create a new map.
|
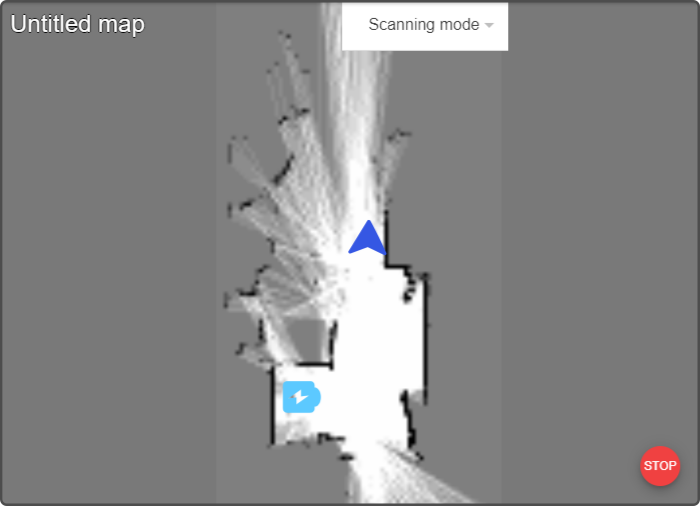
Mapping the environment
Once a new map has been created, the blueprint will only display the immediate surroundings:
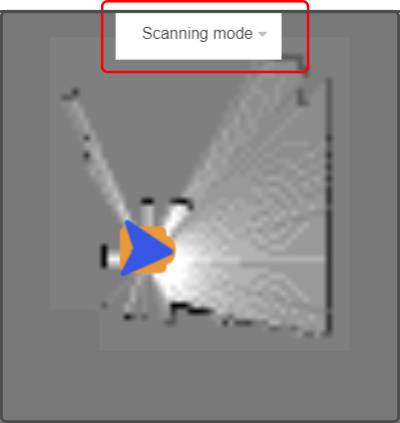
| Make sure the option 'Scanning mode' is enabled in the control to update the map. |
Undocking from the charging station
When moving the device away from the charging station, the device will always move to a safe undocking point. Do not move the device with the manual controls while the device is moving to said location.
Mapping the rest of the environment
Use the movement controls to move the device manually and fill in the map.
| If the device hasn’t been moving for more than 60 seconds, the 'Scanning mode' will be disabled. |
|
See the chapter Mapping guide for the next step(s).
Toggle scanning system
Scanning in this context implies the updating of the map based on the data of the navigation/mapping system installed on the device.
Switching modes
Tap the option 'Navigation mode' or 'Scanning mode' at the top of the page to display the following options:
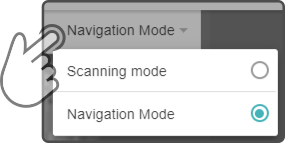
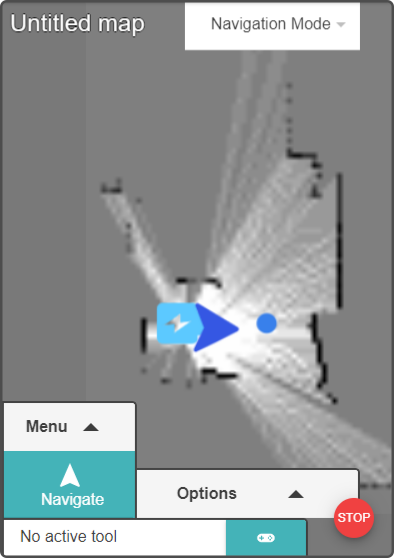
Navigation mode
Tap the option 'Navigation mode' to keep the map as-is and not be updated anymore. This does not imply however that the navigation system and scanning system will be disabled, only that the current map will no longer be updated with the latest information (save for the current location).
| The latest data of the scanning system will still be used to navigate around detected obstacles at the time. |
| It is highly recommended to add virtual walls to the map when using this mode. |
Scanning mode
Tap the option 'Scanning mode' to update the map based on the information of the scanning system installed on the device.
| Only use this mode while creating the map. Once the map has been filled in, switch to 'Navigation mode' to move the device and/or add additional elements to the map. |
| The scanning mode will disable after 60 seconds of the device standing still. |
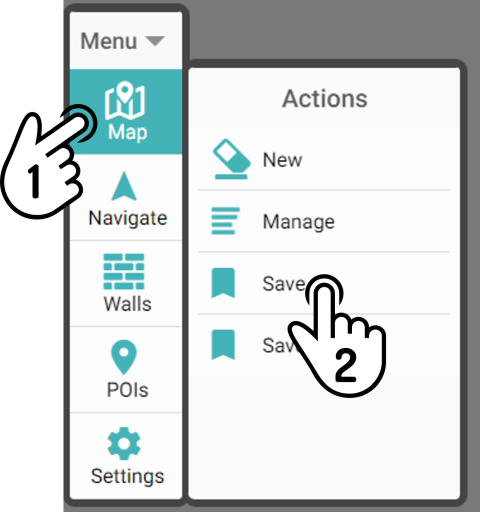
Saving the map
Once the map has been filled in and/or the POIs and walls have been added, the map can be saved. Tap the option Save in the menu Map to save the current map.
If the map hasn’t been saved before, a modal will be shown asking for a valid name.

After saving the map, the 'Navigation mode' will be enabled.
| It is recommended to save the map without any additions (i.e. walls or POIs) then saving a copy of the map where the objects can be added to the map. |
|
Saving a copy of the map
Tap the option Save as in the menu Map to save the map with a different name.
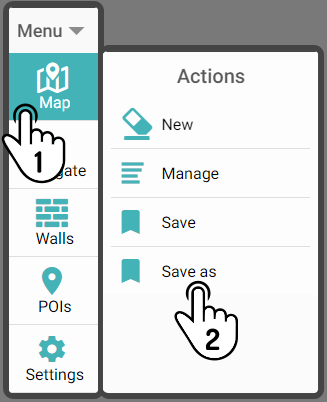
Enter a valid name in the modal and tap the option Save to store the map using a different name.
| The newly saved copy will be set as the active map. |
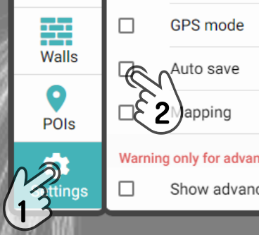
Enabling (partial) auto-save of the map
In addition to manually saving the map, a feature is available that will automatically save the current map when a POI or wall is added, edited or removed.
Tap the option Auto save in the menu Settings to toggle this feature:
Opening a map
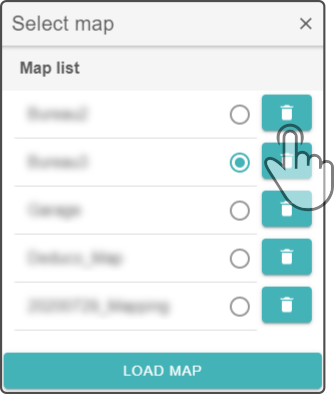
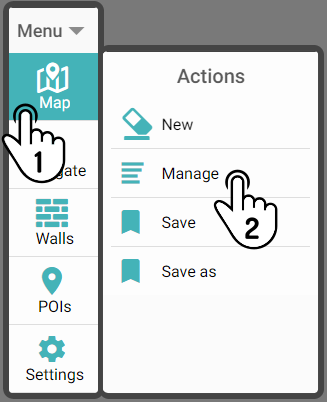
Tap the option Manage in the menu Map to show a list of all the maps stored on the device.
Tap on an available map to select it and tap the option Load map to use the selected map.
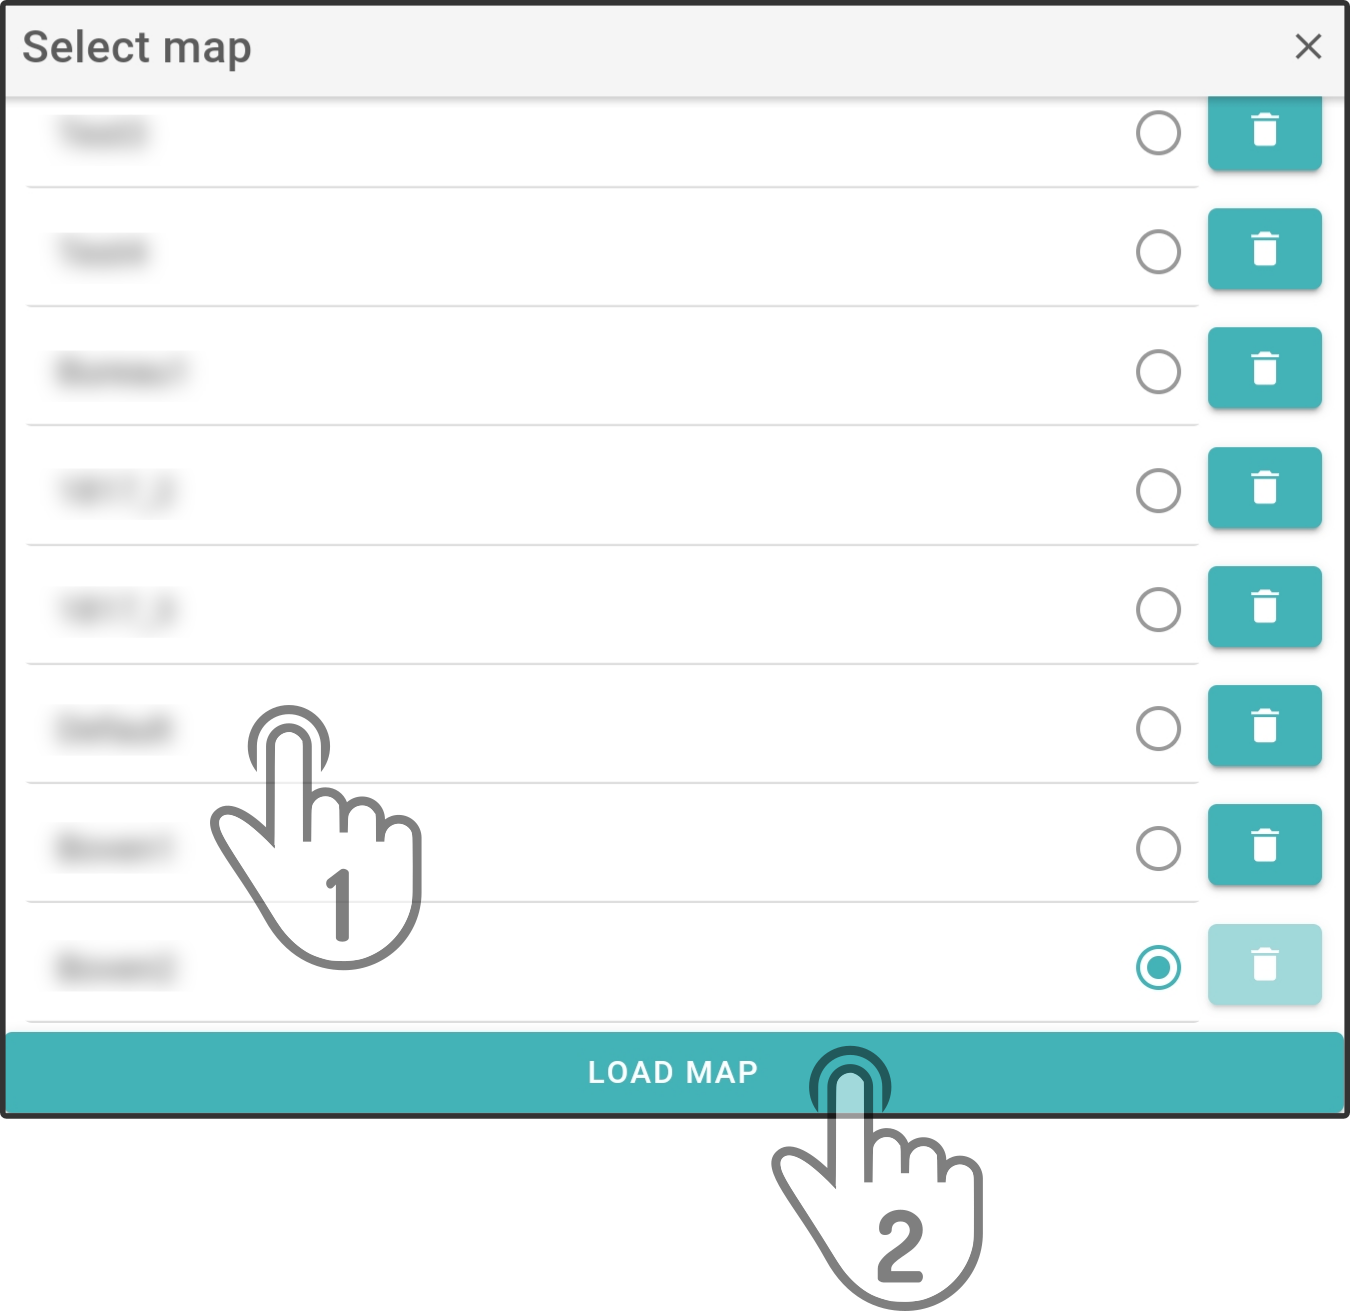
Tap the icon to close the modal without loading a map.
|
The device will be placed on its last known location of the map, regardless of the actual location of the device. It is therefore highly recommended to place the device on the charging station when changing maps. To change the position of the device manually, see the Advanced settings. The page Localisation and mapping may need to be reloaded before the map is fully shown. To reload, go to another page (steering for example) and return to the Localisation and mapping page. |