Dashboard Editor
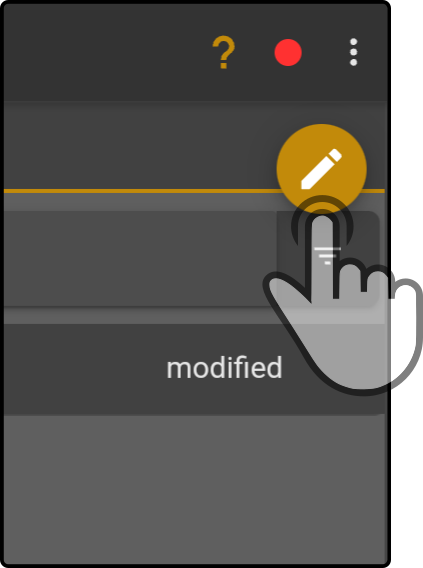
Tap the ![]() icon in the top right corner to edit the layout of the dashboard:
icon in the top right corner to edit the layout of the dashboard:
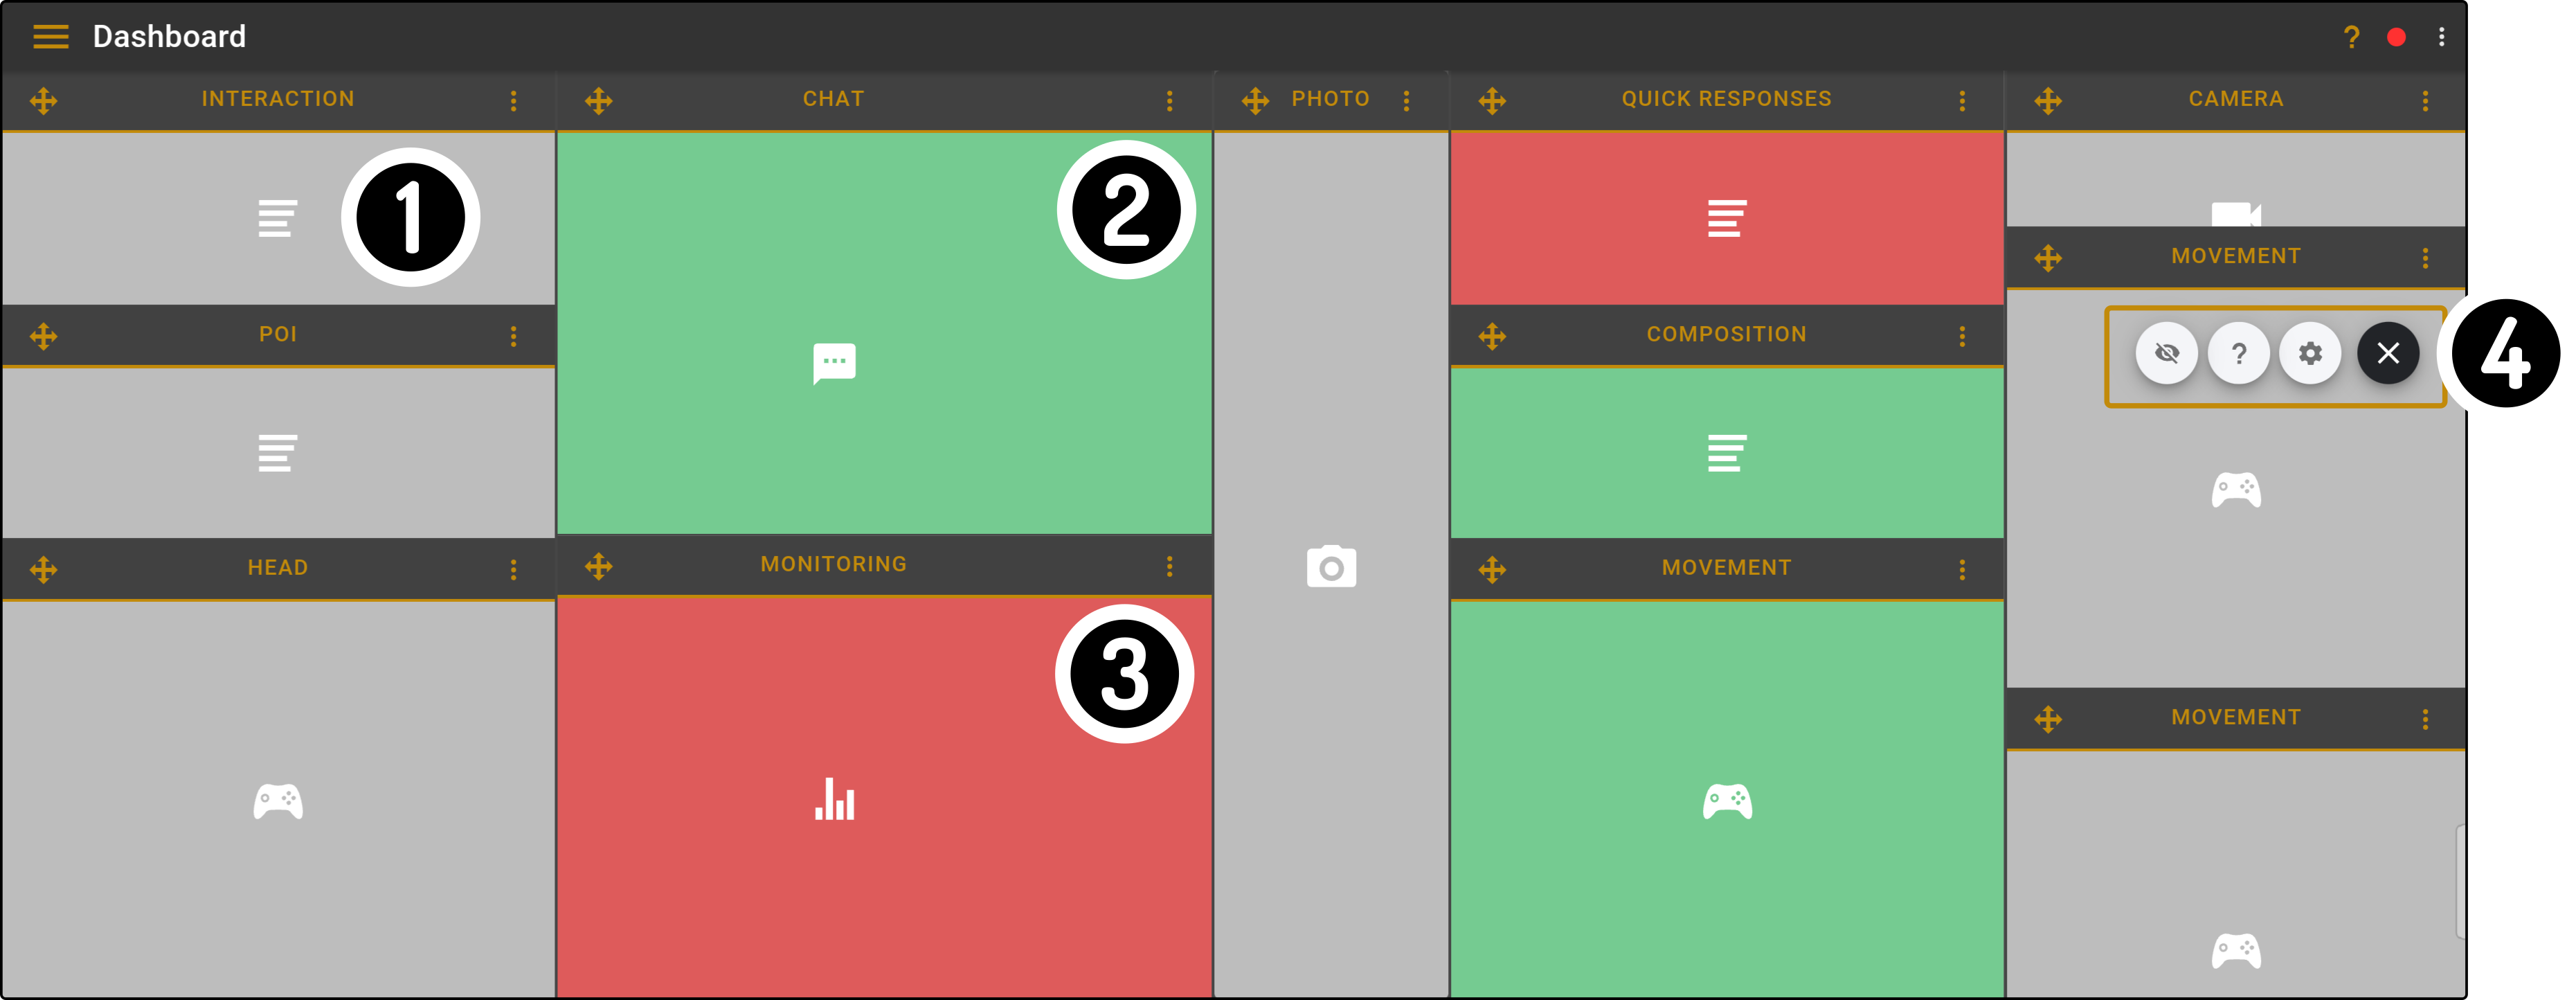
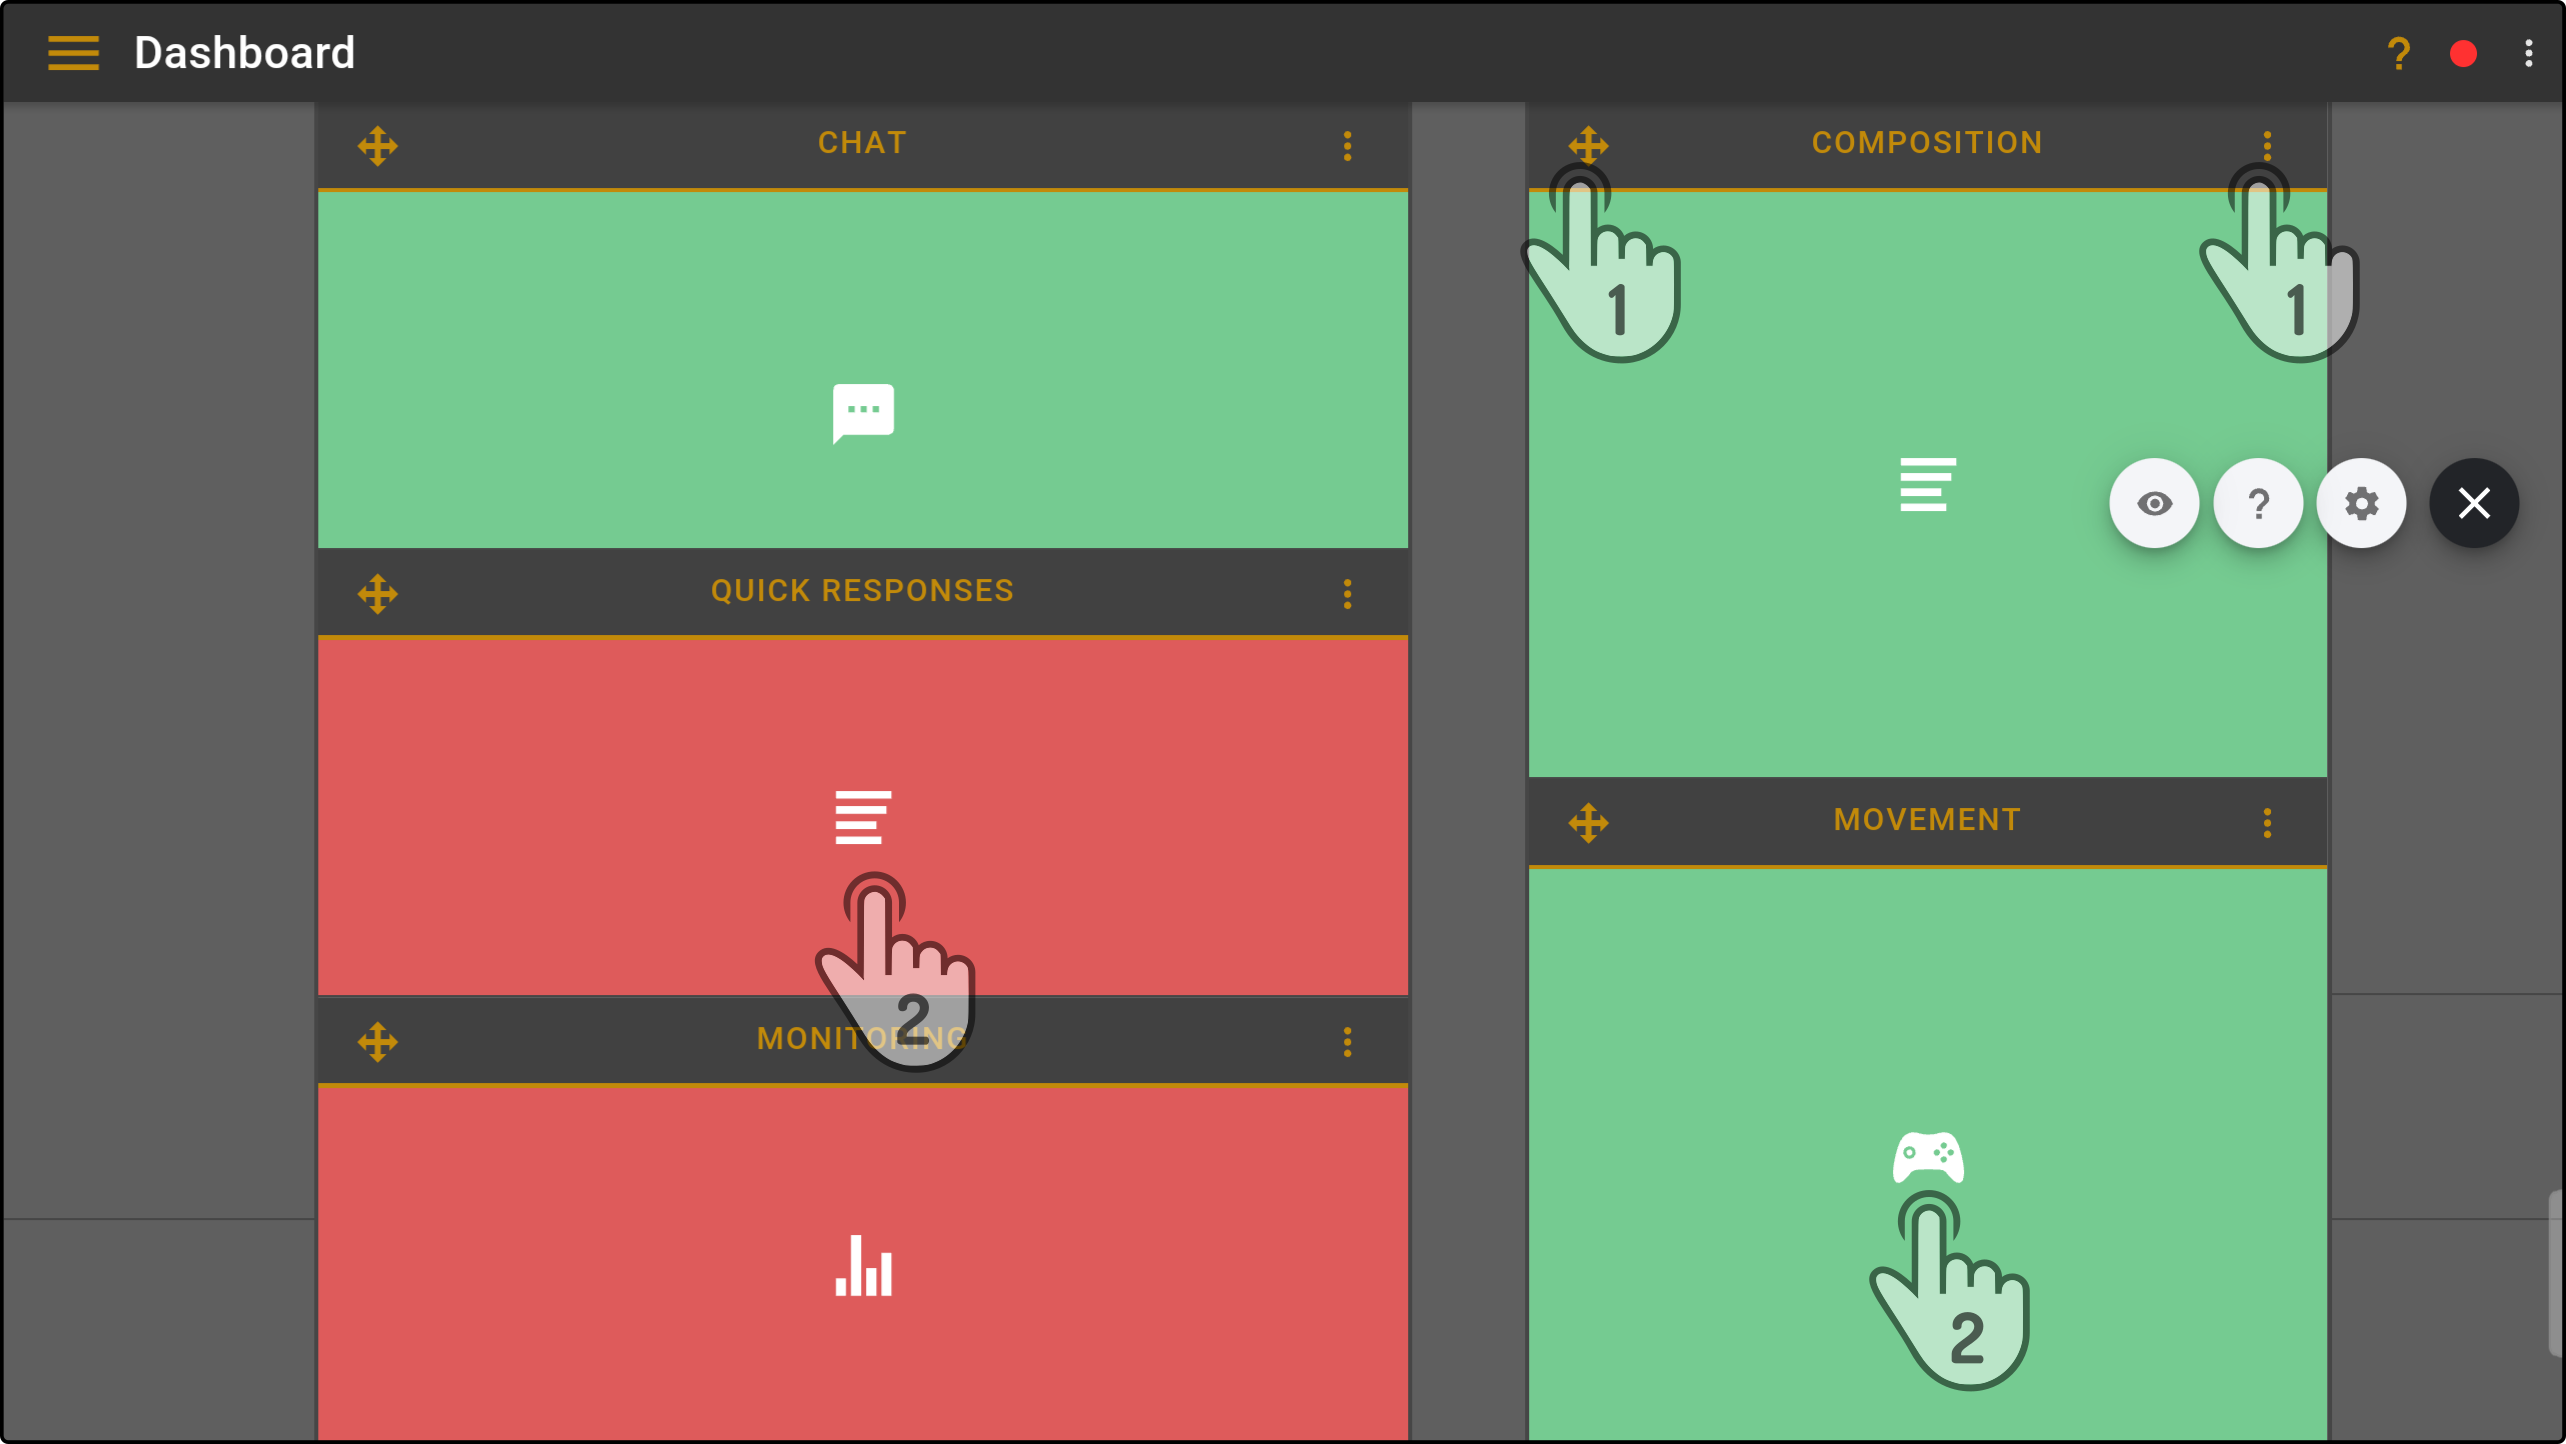
The following elements will be shown:
-
Widgets incompatible with the connected smart device will be shown in grey
-
Active widgets will be shown in green
-
Inactive widgets will be shown in red
-
A toolbar is shown in the top-right corner
| The incompatible widgets are hidden by default and can be shown by tapping the in the toolbar. |
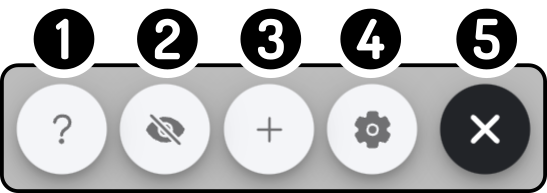
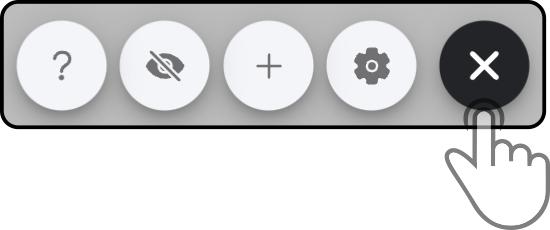
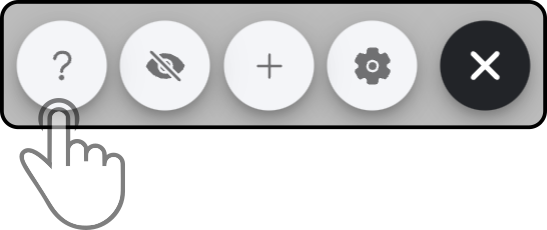
The following options are available for the toolbar:
-
Tap the icon to display useful tooltips on how to use the editor
-
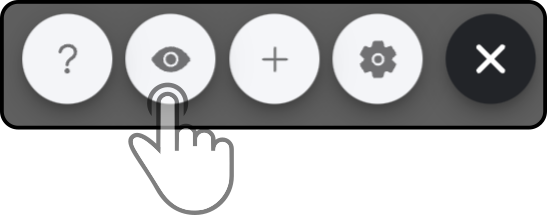
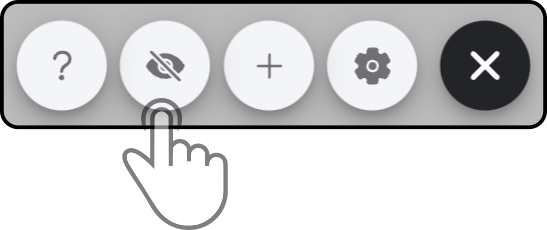
Tap the icon to show or hide the incompatible widgets
-
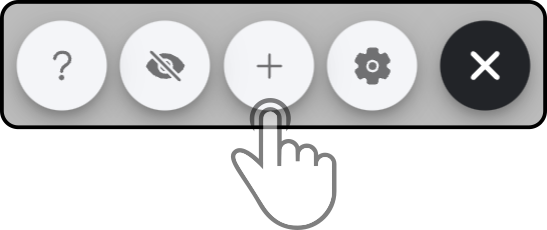
Tap the icon to add a new widget to the dashboard
-
Tap the icon to display a menu for the dashboard
-
Tap the icon to close the editor and return to the dashboard
|
Editing the widgets
The widgets on the dashboard can be edited in 2 ways, specifically:
-
Drag a widget to another location on the grid or place the widget on another location on the grid.
|
It is NOT possible to alter the size of the widgets. If a column is empty however, the other columns (except for the photo and video-control) will be resized accordingly. A different layout is used depending on the orientation of the tablet (landscape of portrait). For your convenience, the icon can be dragged around on the dashboard-page in case it overlays the controls of the widgets. |
Moving the widgets
Drag a widget by holding the icon, dragging the widget and release the icon in the new location:
| The third column in the grid is reserved for the 'Photo' widget. |
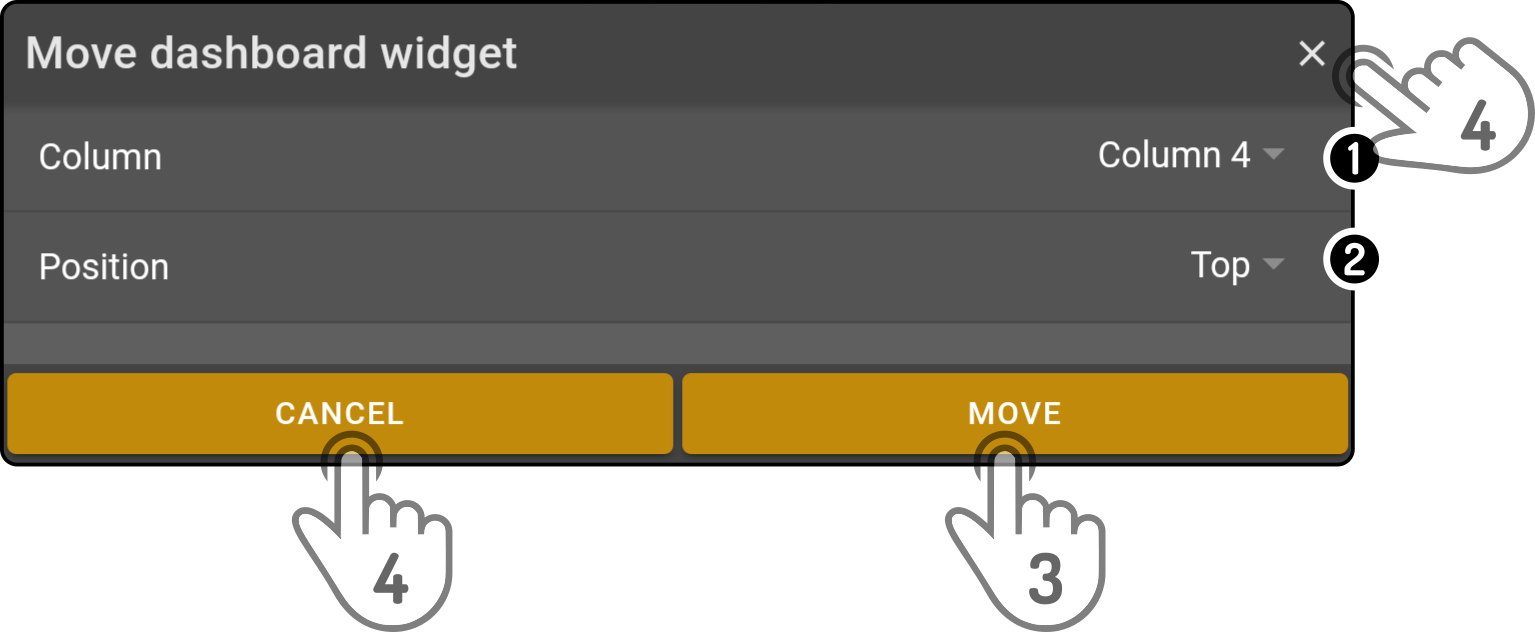
Placing a widget
Tap the icon to view the options for the widget.
-
Tap the column for the widget to be moved to (column 1,2,4 or 5).
-
Select the position of the widget (Top or bottom).
-
Tap the option 'Move' to relocate the widget to the entered settings.
-
Tap the button 'Cancel' or tap the icon to close the options without moving the widget.
Hidden widgets
Tap the icon to show widgets incompatible with the current connected device. These widgets will be displayed in grey.
| Even though these widgets can be shown, they cannot be enabled or disabled, only relocated. |
This feature is most useful when switching between device-types quite often.
Tap the icon to hide the incompatible widgets.
Adding widgets
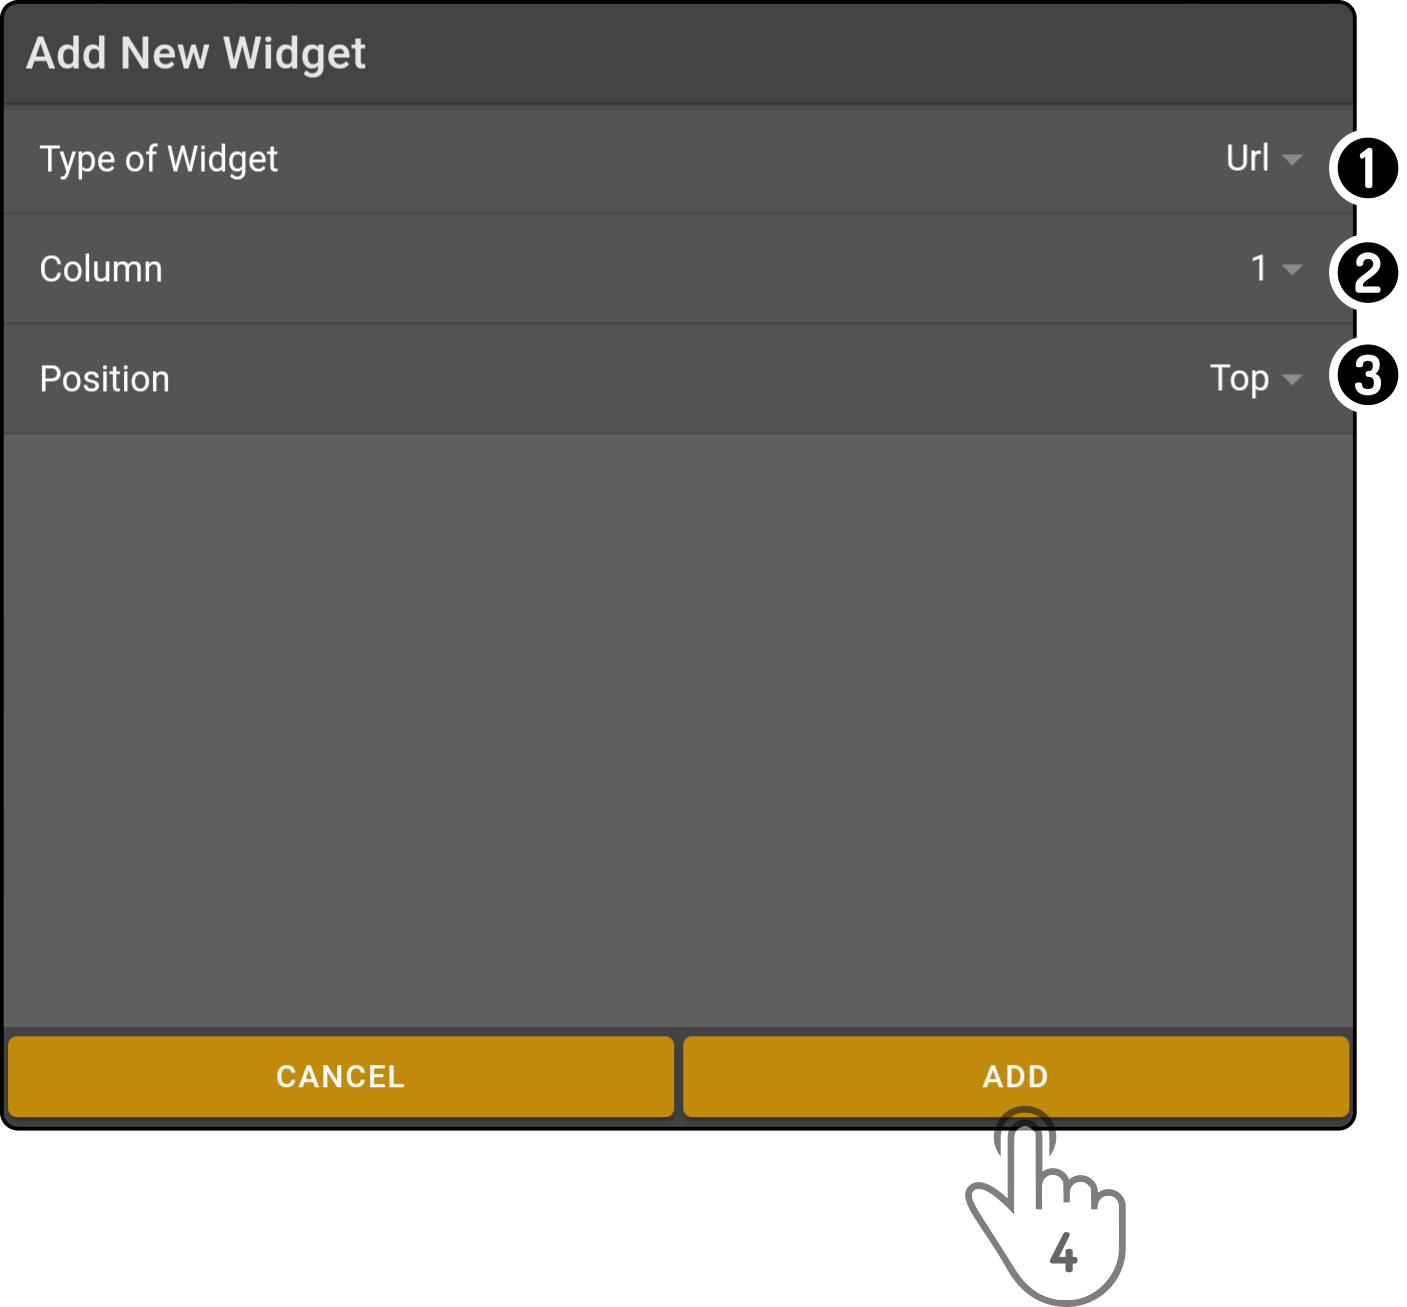
Tap the icon to add a new widget to the dashboard:
The following options will be shown:
-
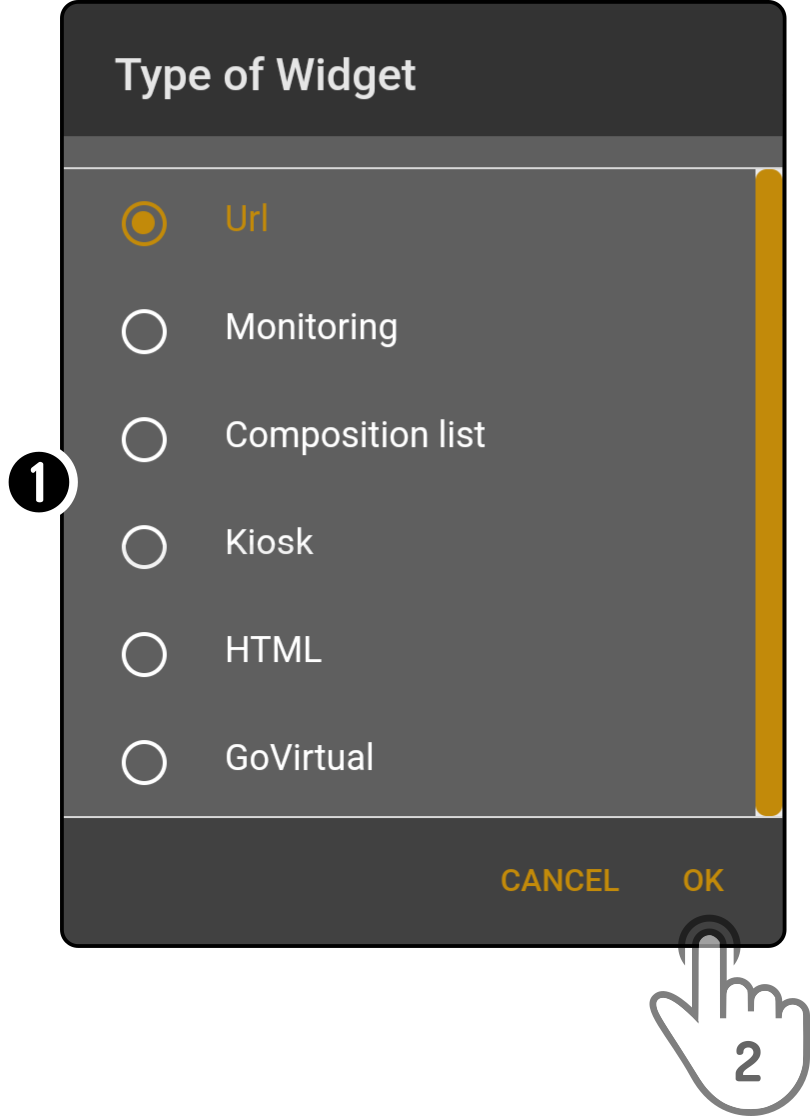
Tap the option 'Type' to display a list of available widgets to add:
-
Tap to select the type of widget to add
-
Tap the button 'OK' to select it
-
-
Select in which column the widget should be added
-
Select whether the widget should be added at the top or bottom of the column
|
Dashboard configurations management
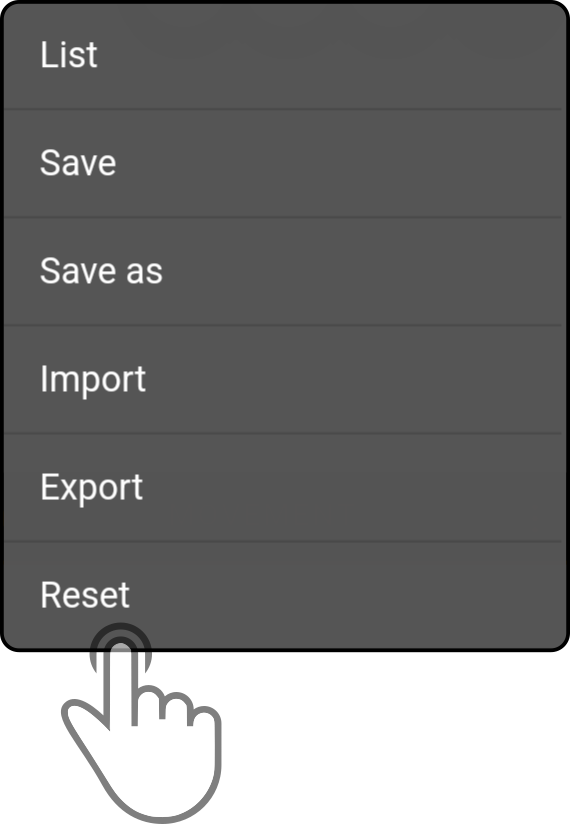
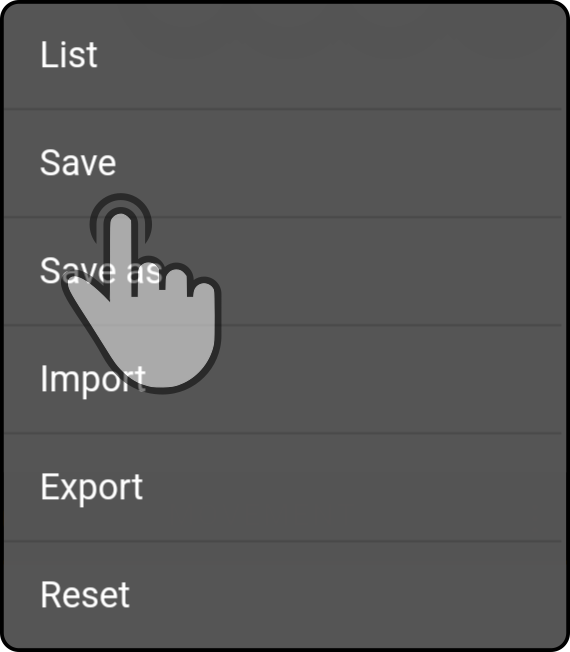
Tap the icon to display a menu for the dashboard:
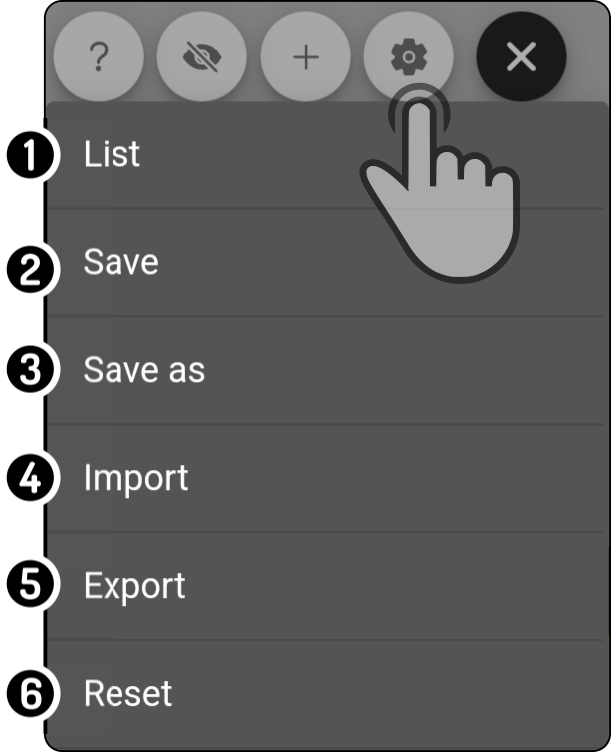
-
Tap the option 'List' to display a list of stored dashboard configurations. This modal can be used to load earlier saved dashboard configurations or to delete exisiting dashboard configurations.
-
Tap the option 'Save' to save the current dashboard configuration.
-
Tap the option 'Save As' to save the current dashboard configuration with a different filename.
-
Tap the option 'Import' to import an exported dashboard configuration.
-
Tap the option 'Export' to export a saved dashboard configuration.
-
Tap the option 'Reset' to reset the current dashboard to the default configuration.
| The dashboards aren’t stored on the connected device, only on the device ZBOS Control has been installed on. |
List of stored dashboards
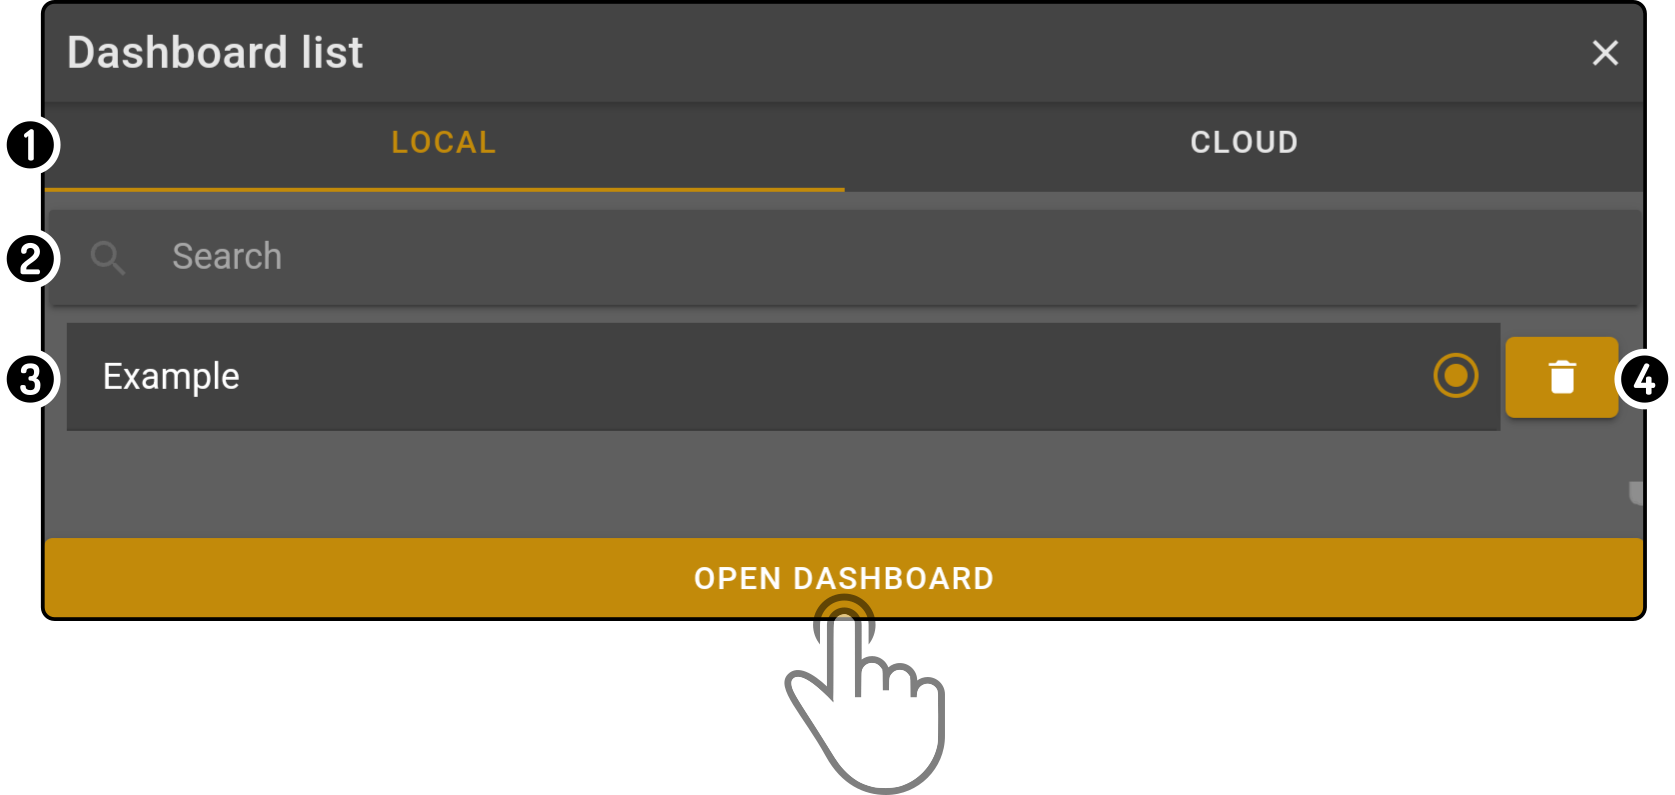
Tap the option 'List' to display the stored dashboard configurations:
-
Tap the tab at the top of the modal to select the location of the stored dashboard.
Tap the option 'Local' to view the dashboards stored in the Control app.
Tap the option 'Cloud' to view the dashboards stored in the Cloud account of the logged in user(1). -
Enter a search term to filter the list of available dashboards.
-
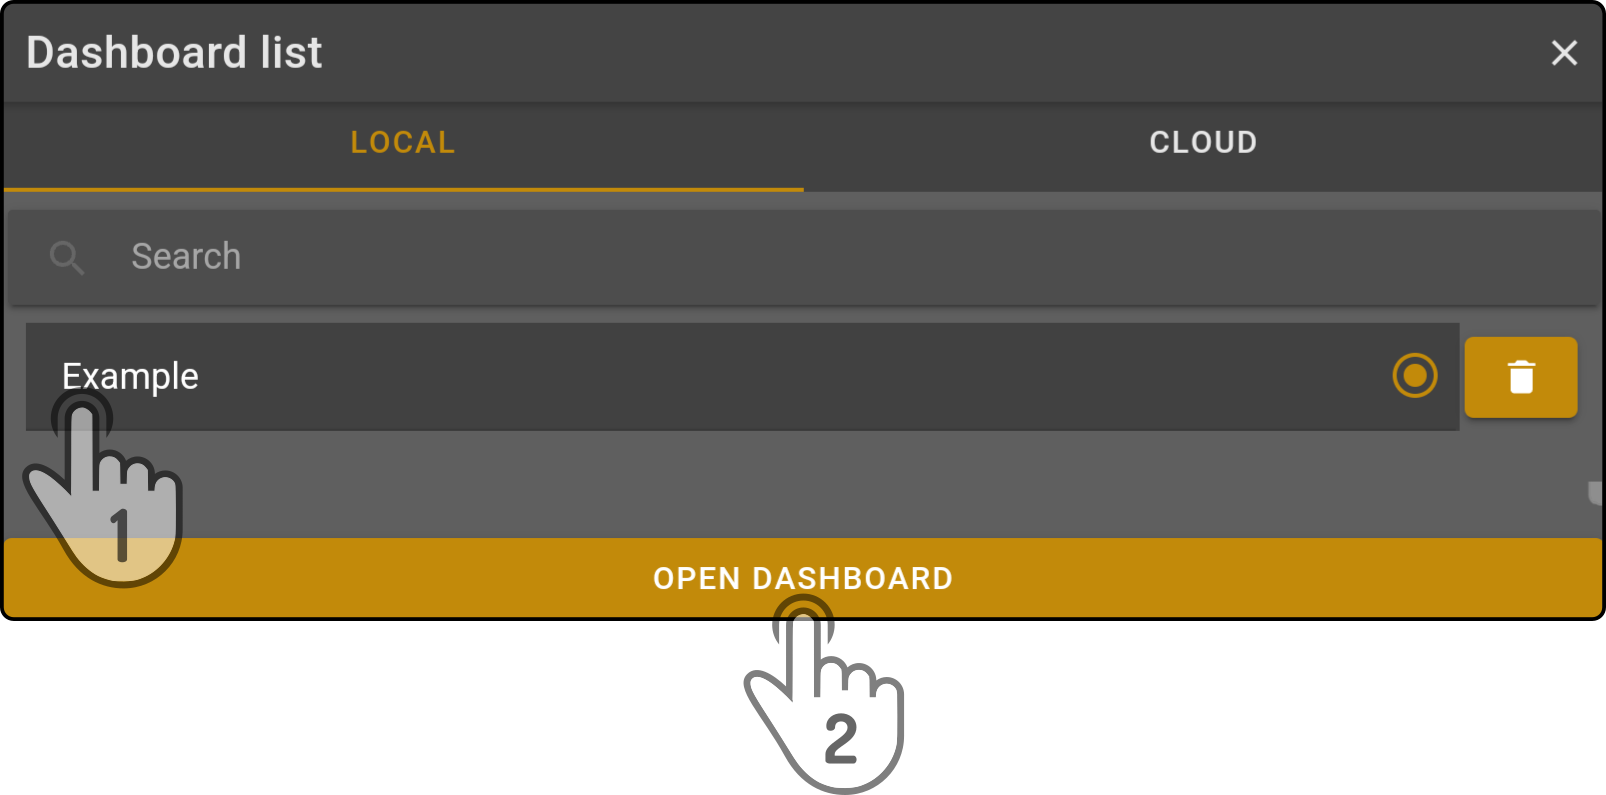
Tap a dashboard in the list to allow the dashboard to be loaded.
-
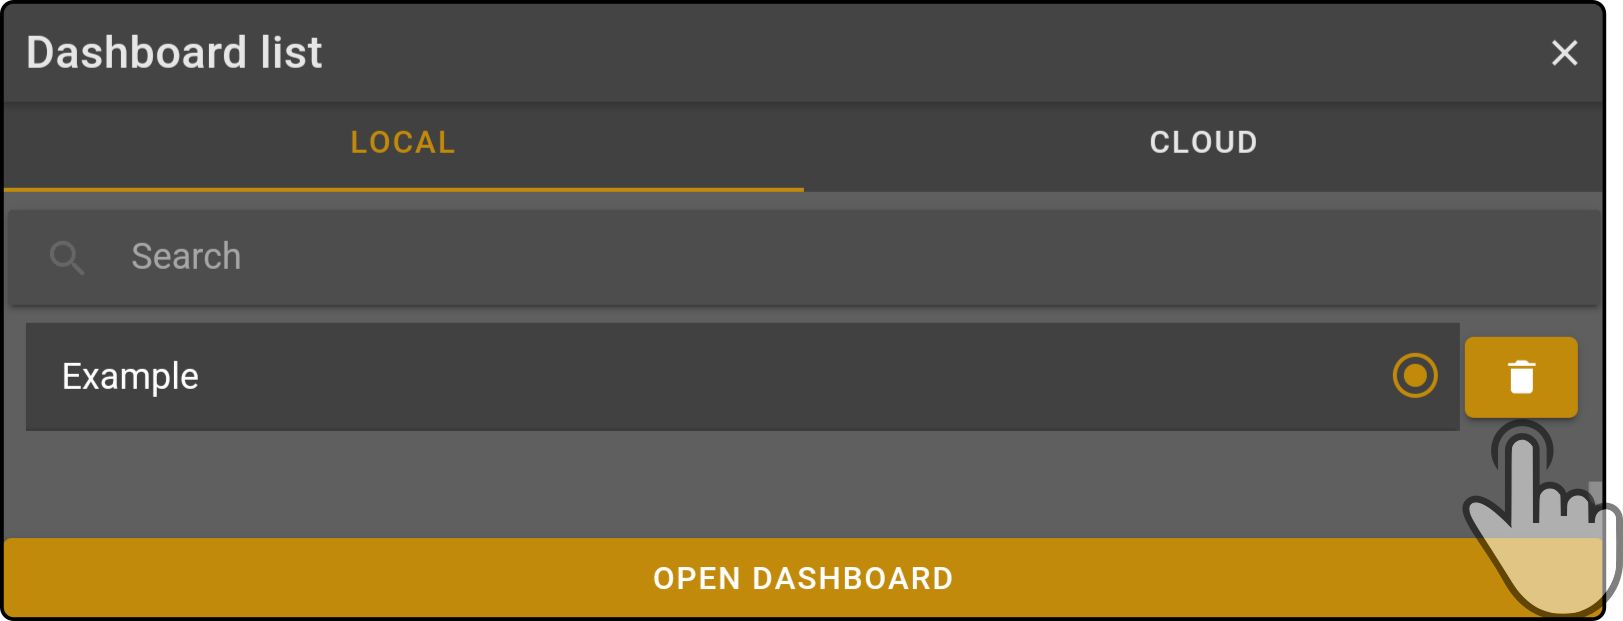
Tap the to delete the stored dashboard configuration(2).
(1): This tab will only be shown if the user is logged into the cloud.
(2): This This will not erase the current dashboard, only the saved configuration.
To reset the current dashboard, see Resetting the dashboard.
Saving a dashboard
Tap the option Save in the menu to store the current dashboard configuration:
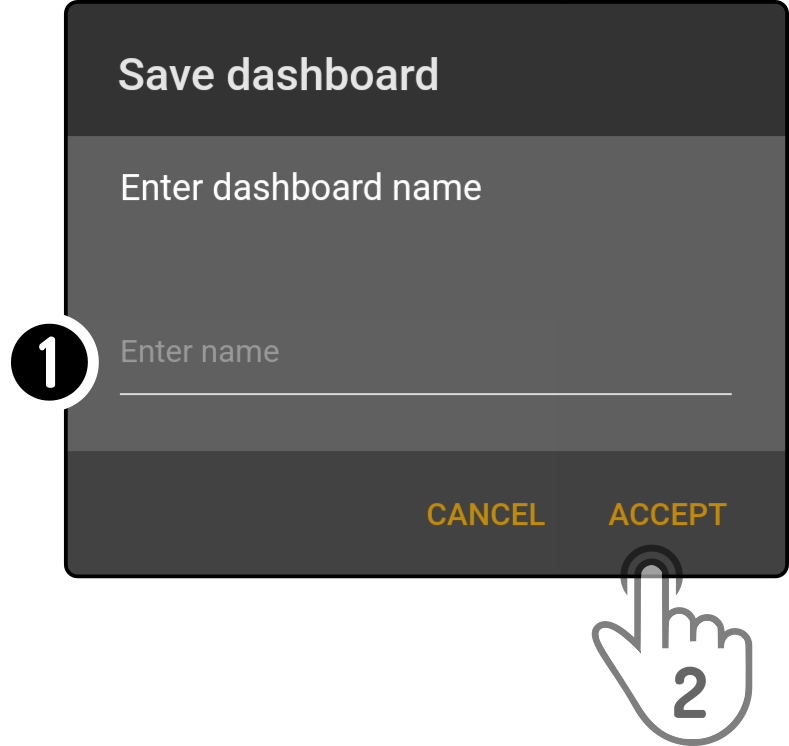
When saving a dashboard for the first time, a modal will be shown asking for a name for the dashboard configuration:
-
Enter a name for the dashboard configuration.
-
Tap the button 'Accept' to save the dashboard configuration.
Saving the dashboard for the following events, only a confirmation message is shown:

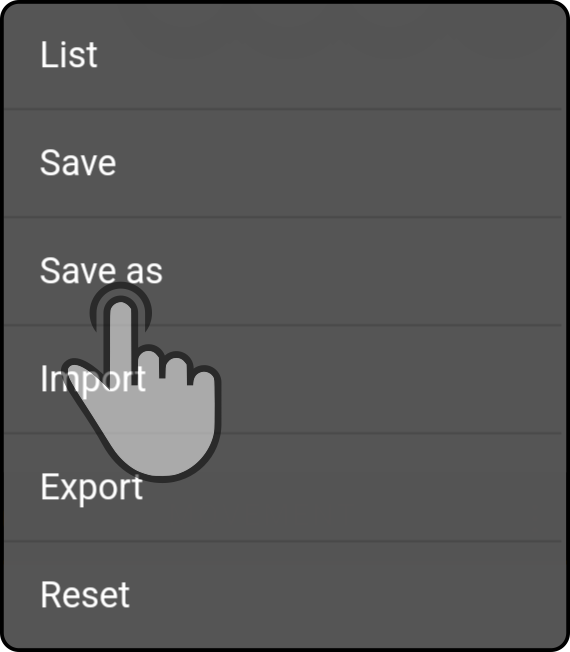
Saving a duplicate of the dashboard
Tap the option 'Save As' in the menu to store the current dashboard configuration with another filename:
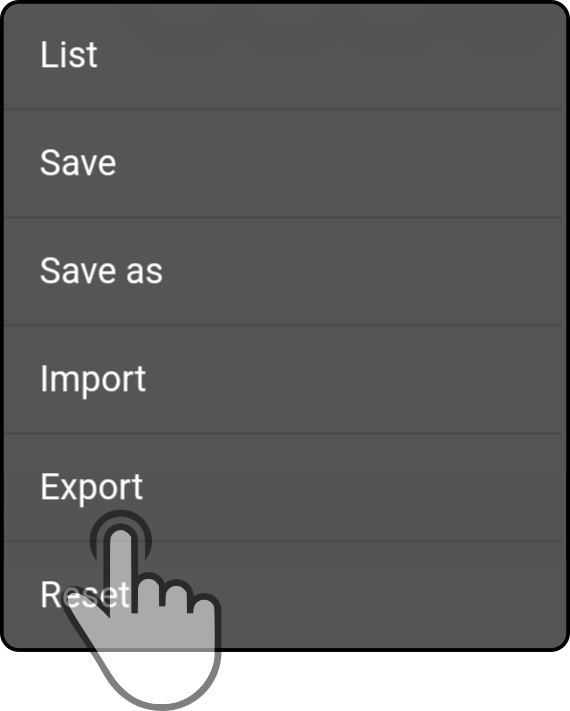
Exporting a dashboard
|
Tap the option 'Export' to display the list of stored dashboard configurations:
Tap the button ![]() to download the dashboard to the connected device:
to download the dashboard to the connected device:

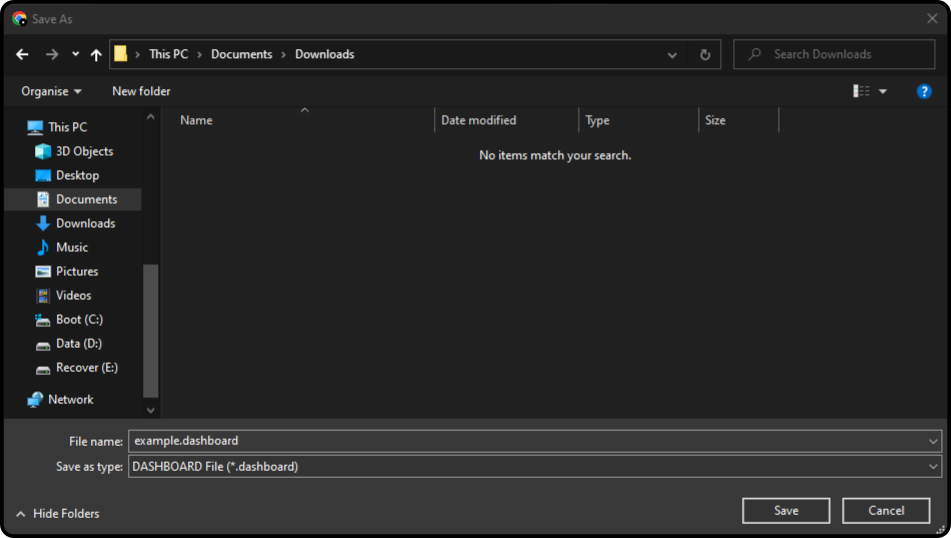
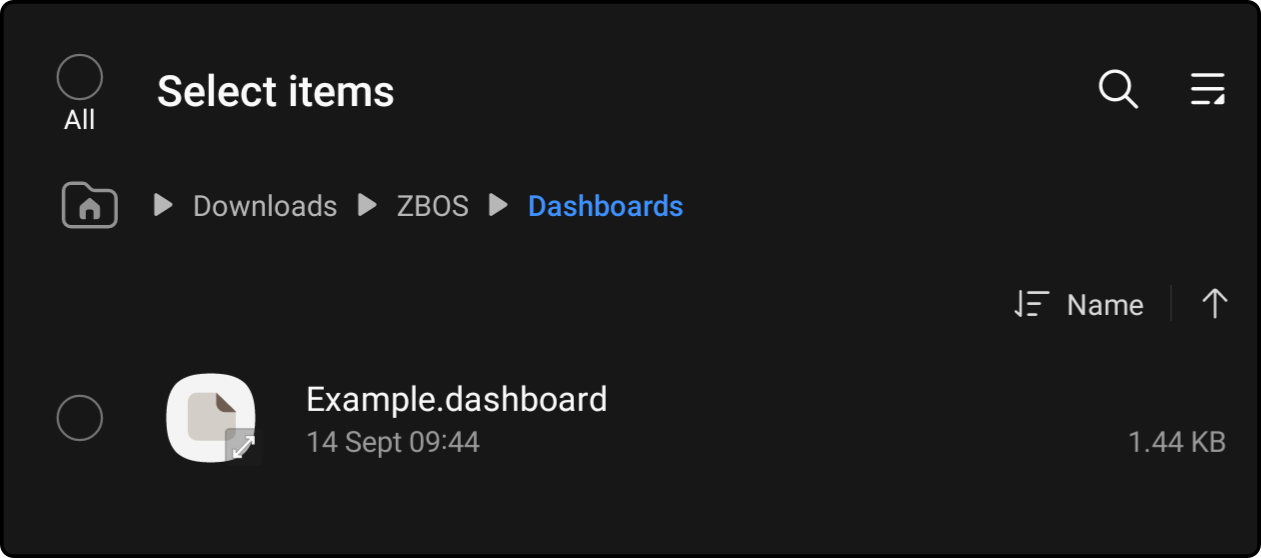
The selected dashboard will be downloaded to a default location with a default filename on iOS or Android devices. For example, the dashboard configuration named 'Example' will be saved as Example.dashboard in the Downloads/ZBOS/Dashboards folder:

When using the website portal, a custom filename and file location can be selected:
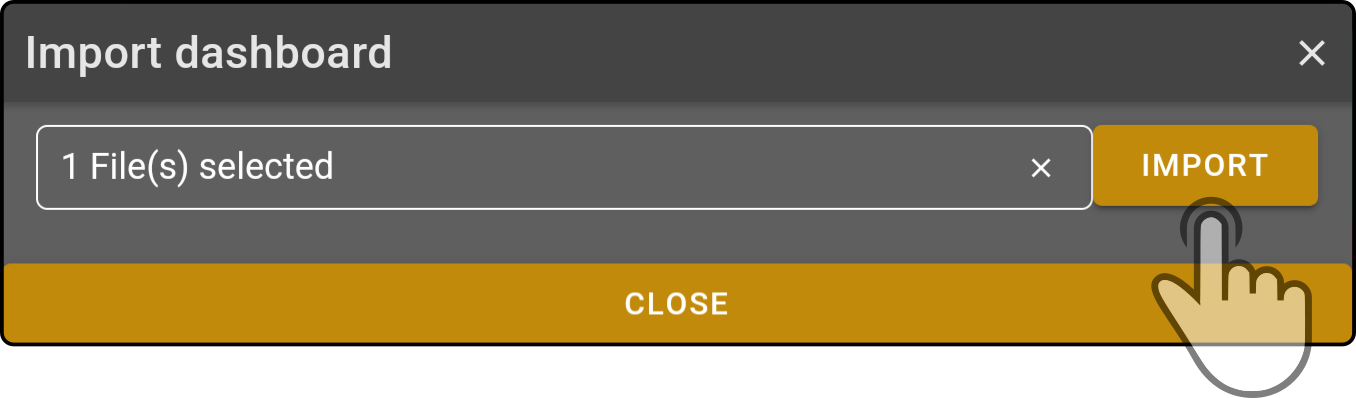
Importing a dashboard
Tap the option 'Import' to display a modal asking for the exported dashboard to import:

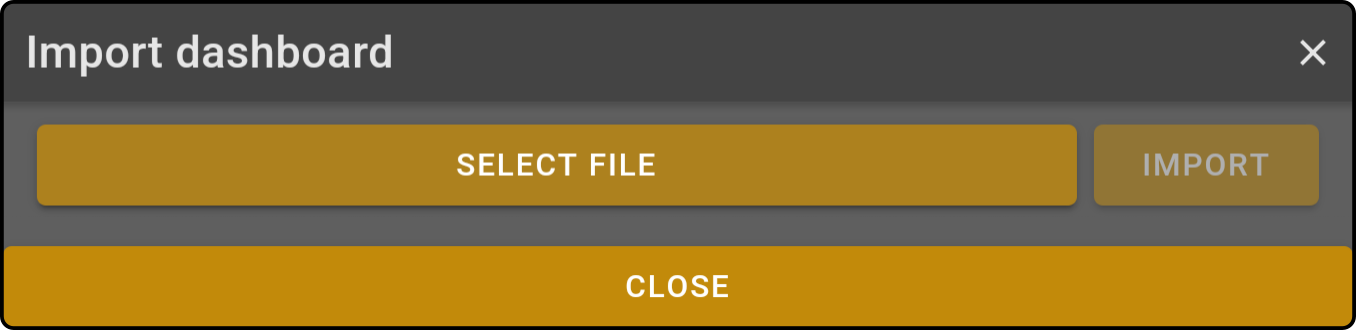
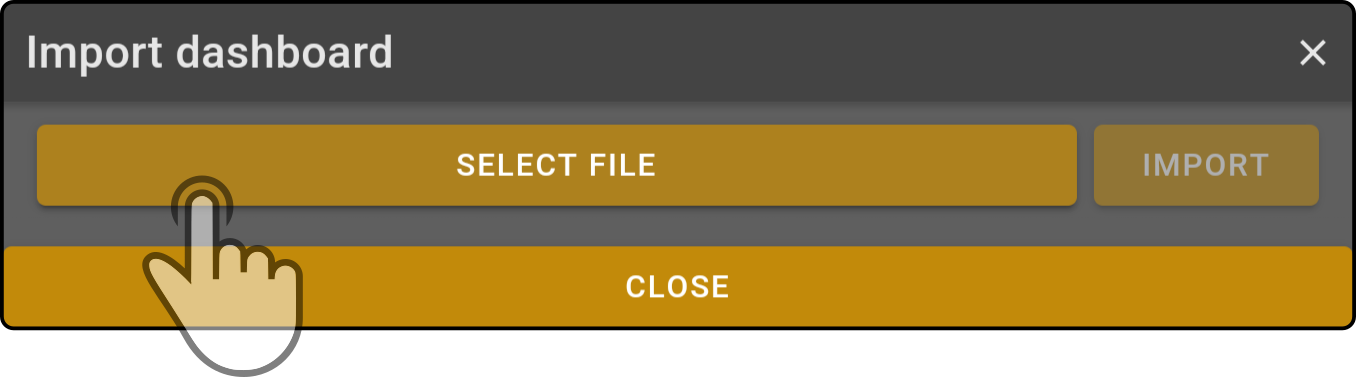
Tap the option 'Select File' to open an explorer window asking for the dashboard(s) to be imported:
Select one or more dashboard-file(s) to import and tap the button 'Open' to upload the file(s) to ZBOS Control:
Tap the button 'Import' to add the uploaded dashboard configurations to the list:
A message will be shown stating the dashboards have been successfully imported.
| The imported dashboard still needs to be opened. See the chapter List of stored dashboards for more information. |